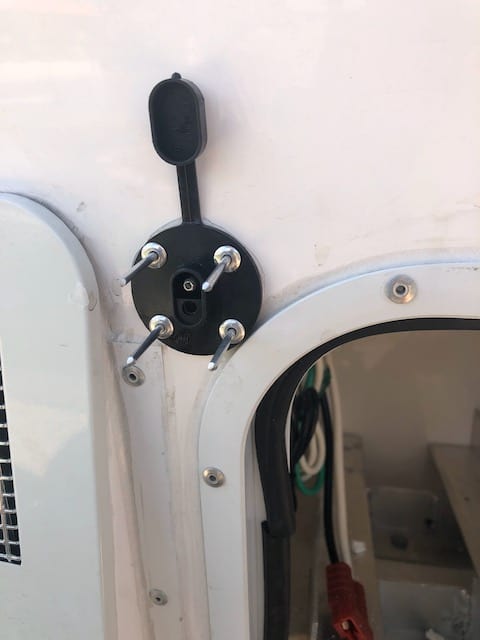
A flush mounted solar port makes a Casita “solar ready”. A portable solar panel can be plugged in to help charge the battery when camping “off the grid”.
Because the plug is directly wired to the battery, it requires a solar charge controller which is included on “suitcase” style portable panels. Do not wire a bare solar panel without a controller, it will put too much unregulated voltage to the battery.
Items needed:
- Flush mounted solar port – available here: scroll down to part “D”
- 4, 3/16 x 1/2 aluminum rivets
- 12 gauge wire
- 12 gauge ring terminals (2), 12 gauge butt connector
- 12 gauge inline ATO fuse holder and fuse equal to solar controller output (10-30 amps)
- Silicone sealant
Tools needed:
- 3/4″ hole saw, 3/16″ bit, and drill
- Rivet gun
- Wire stripers/crimpers
- Wrenches for battery and terminals
The solar port is also known as a “SAE” or “Zamp” port.
Note: Zamp reverses the polarity on their connectors. If using their panel, be sure the positive lead on the solar connector is going to the positive on the plug you are installing. If it’s reversed, you can swap the red and black wires on the battery.
Steps:
- Remove the battery
- Drill a 3/4” hole to the upper left of the battery door. Before drilling, feel on the backside with your hand so you can ensure the hole will end up inside the battery box.
- Insert the solar plug into the hole, mark, and drill the holes with a 3/16” bit
- Remove plug and use clear silicone RTV on the mounting surface and a little into each rivet hole.
- Re-install the plug and crimp the 4 rivets in place. Dab silicone on rivet heads.
- On the red wire from the plug, use a 12 gauge butt connector to splice to the fuse holder. On the remaining red and black wire ends, install the ring connectors.
- Insert the appropriate size ATO fuse into the holder based on your controller’s rating (usually 30 amp)
- Place battery on a step stool, and install the wires to the battery terminals. Red to Positive (where the black casita wire goes to), and black to negative (where the white and green casita wires go to). Reverse that for a Zamp panel.
- Bolt battery in and you’re done!