
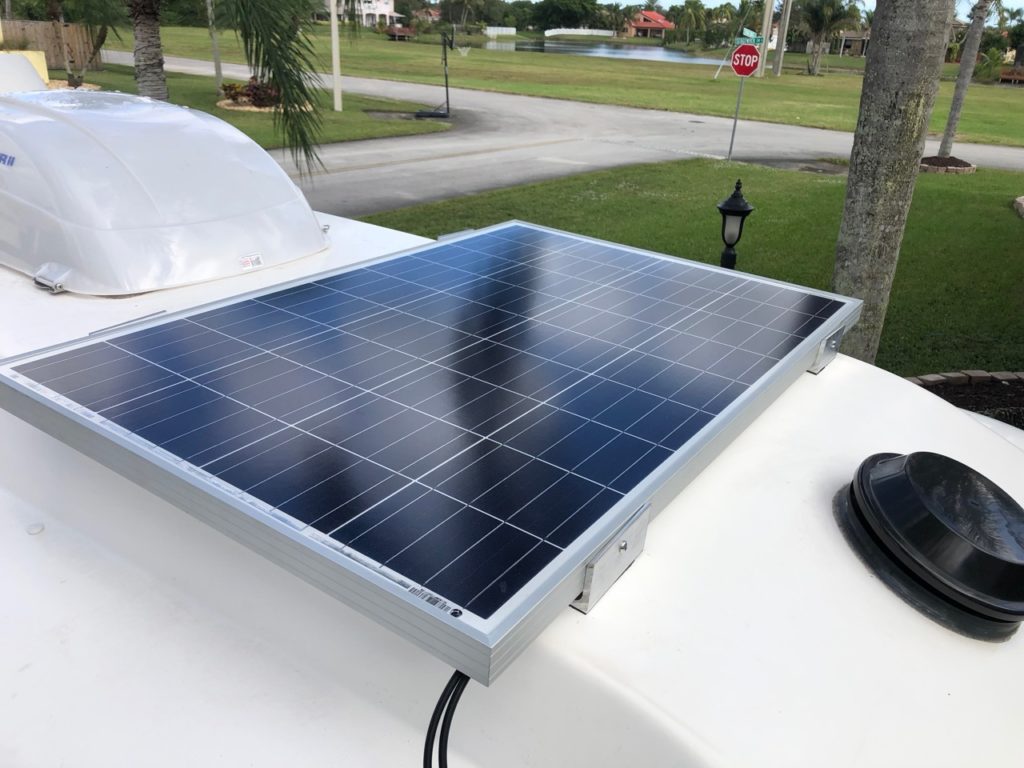
We installed a 100 watt solar panel on the roof of our Casita. The panel will give us enough electricity to keep the battery charged while camping and traveling. Solar alone won’t let us run the air conditioner, but it will make enough power to run the LED lighting, furnace, ceiling fan, water pump, fridge (on propane), and also keep our mobile devices charged. In direct sun, it puts out 5 amps to the battery.
We used the Lightcatcher brand solar panel as it’s a little shorter than the standard Renology panel and it fits best sideways in front of the roof vent.
Mounting the Panel:
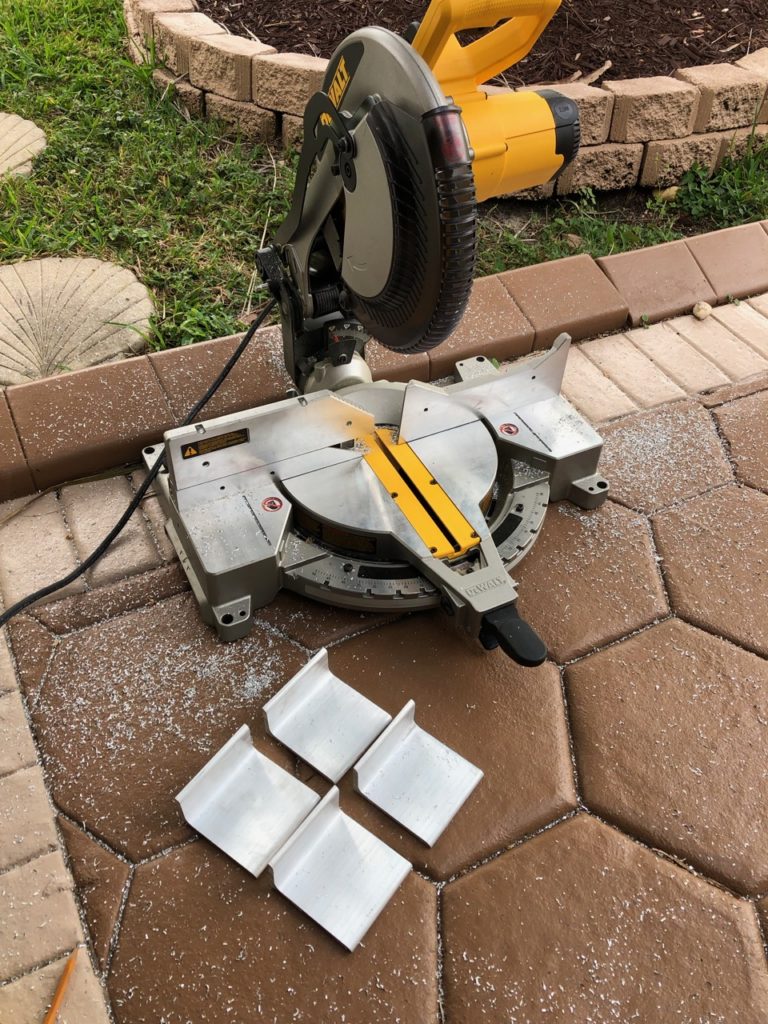
Cutting the mounts 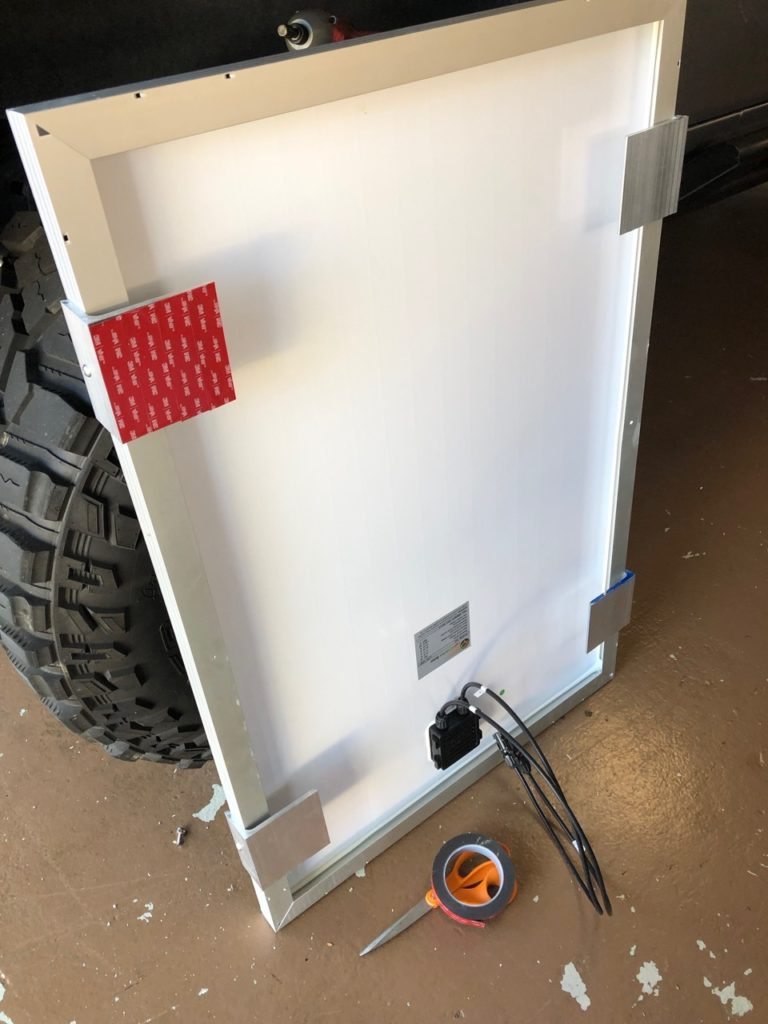
Installing VHB tape 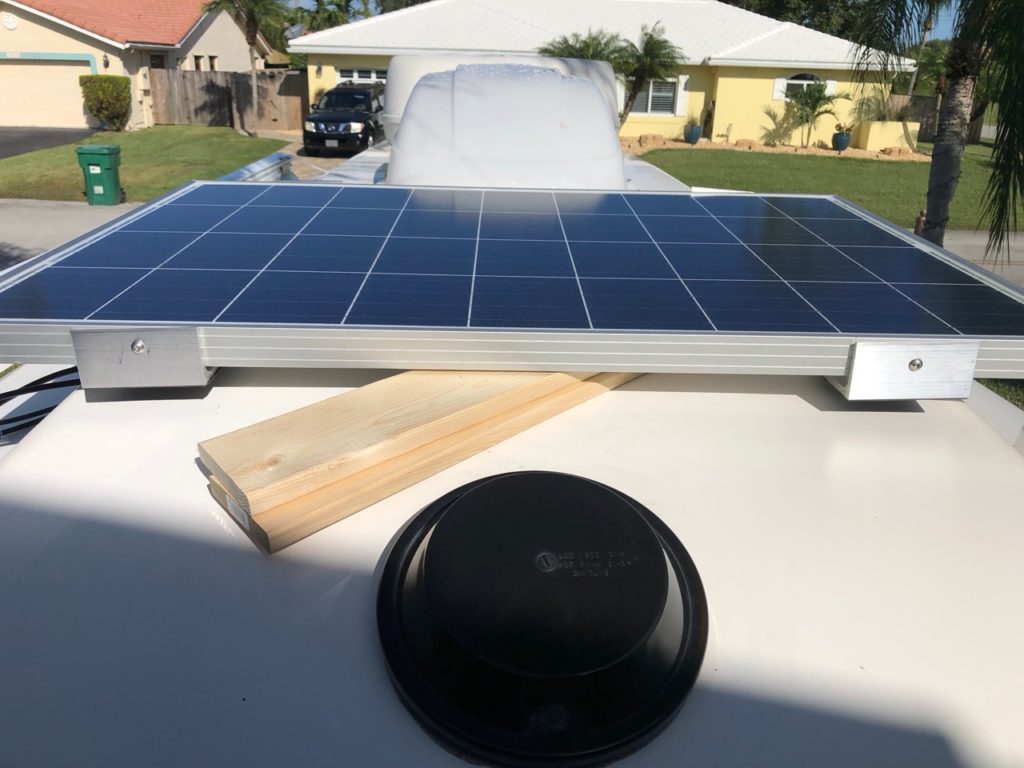
Boards used to position the panel 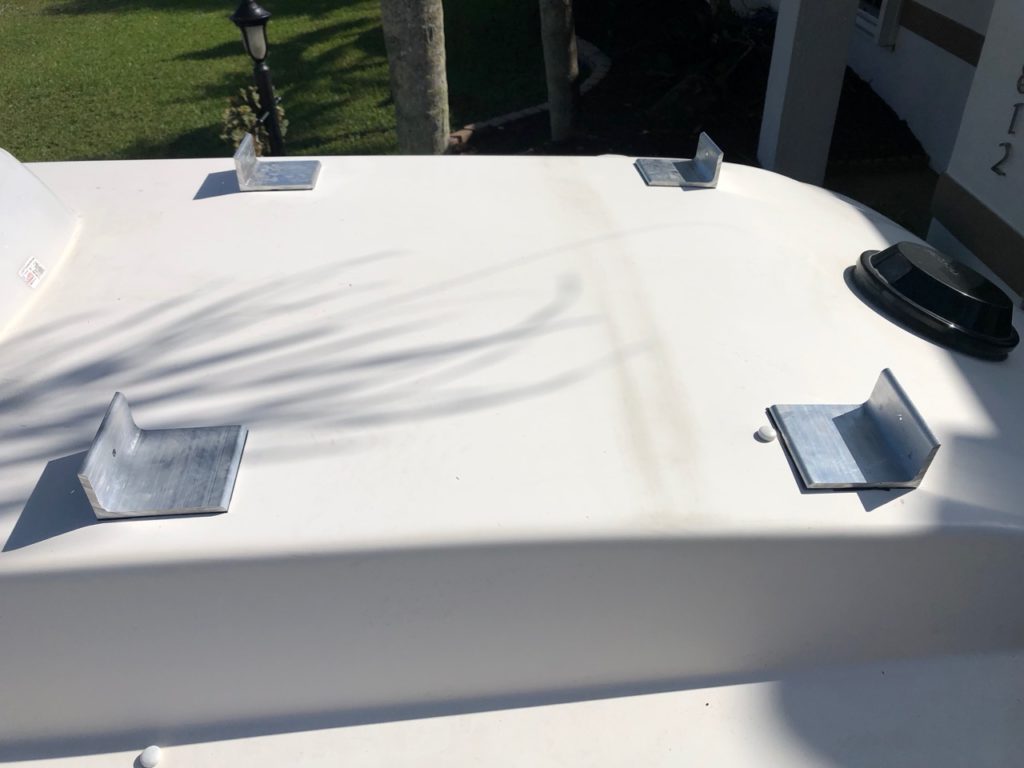
Mounts installed
For mounts I cut 4″ sections of 2×4 aluminum angle and applied 3M VHB 5952 tape. The tape is rated at 350 ounces per square inch. Some quick math shows that it is 1,400 pounds of holding power. That should do the trick to hold the panel in place. McMaster-Carr sells the tape here.
Once the panel was centered sitting on boards, I stuck the panel down. Next I removed the panel so I could stand on the brackets to make sure the tape was adhered to the roof the best I could. I sealed the edges with caulk to keep water and dirt out.
If I did the install again, I would move the mounts back about 4 inches to the backside of the roof rivet in the pictures. As they sit, the front mounts are on a bit of a curve in the roof.
Running the Wires:
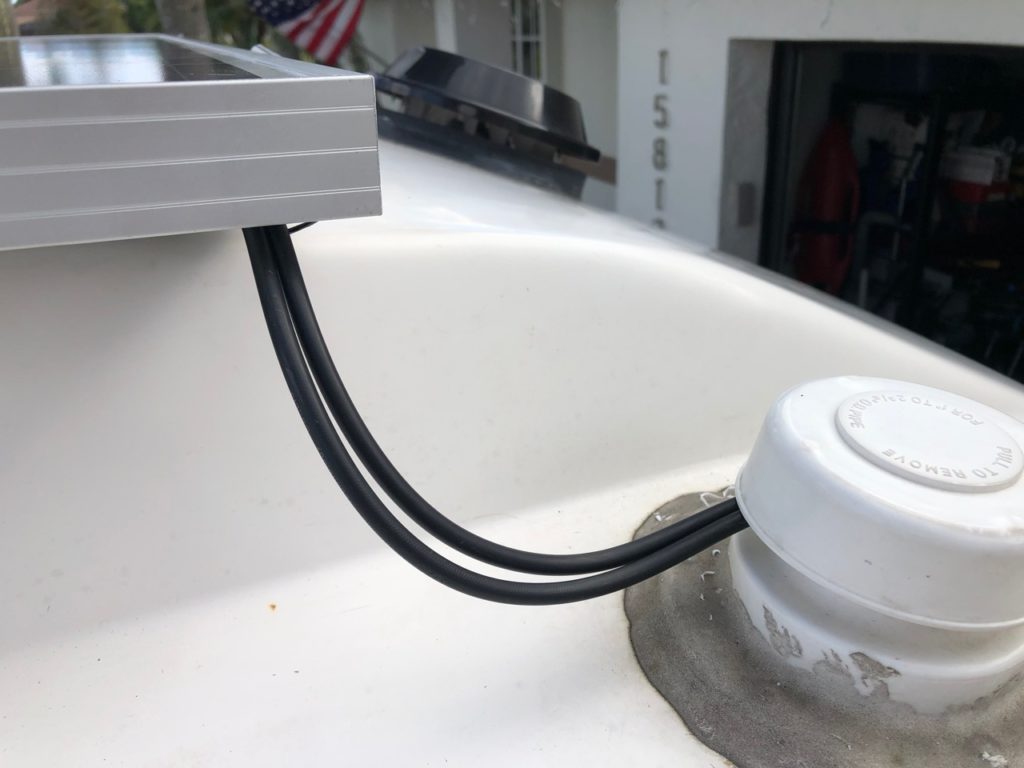
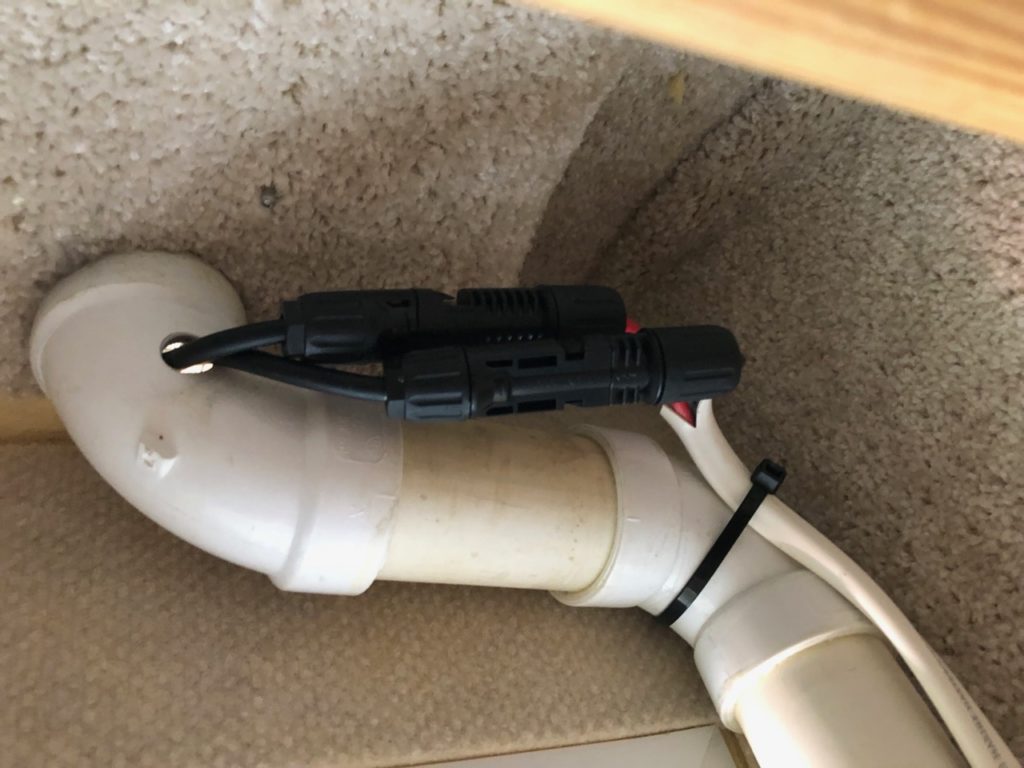
I used marine grade duplex 10/2 wire to minimize voltage loss. In order to avoid drilling holes in the roof, I ran the wire down the gray vent pipe. Inside the closet, a hole was drilled into the side of the vent stack for the wires to exit and the hole was sealed with RV caulk. The panel uses MC4 solar connectors. I took them apart to feed the wires, then re-installed the ends.
The wire runs under the closet wall and along the front of the bathroom wall and under the side bench to the charger controller and battery monitor.
Charger controller and battery monitor
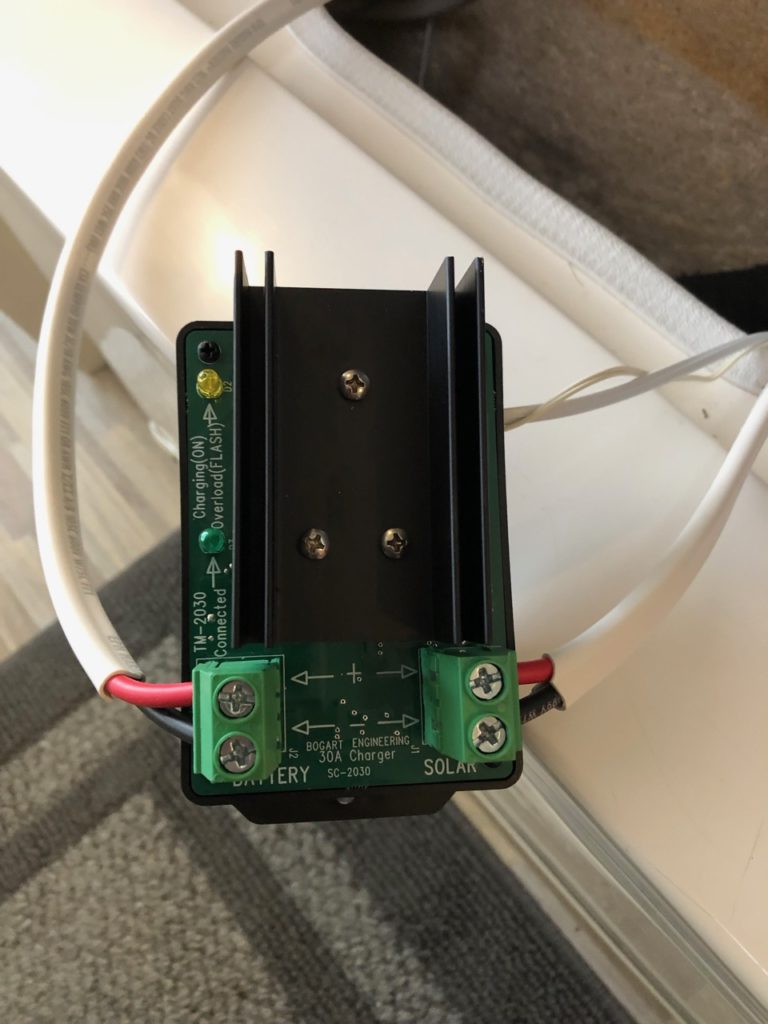
Charger 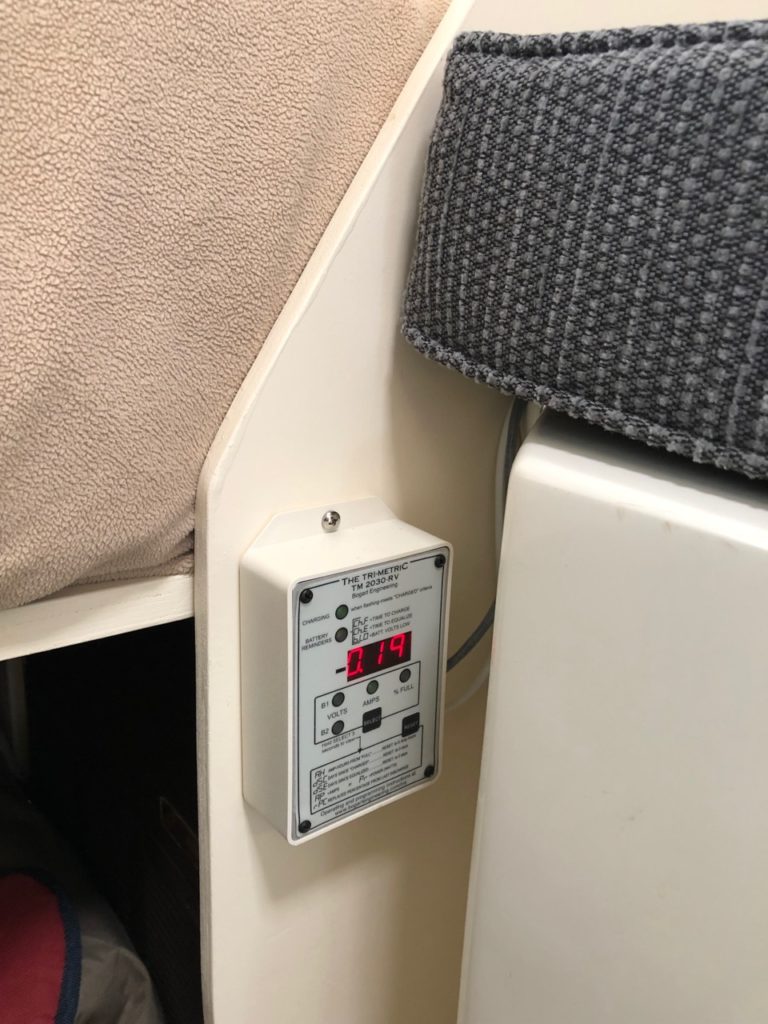
Monitor 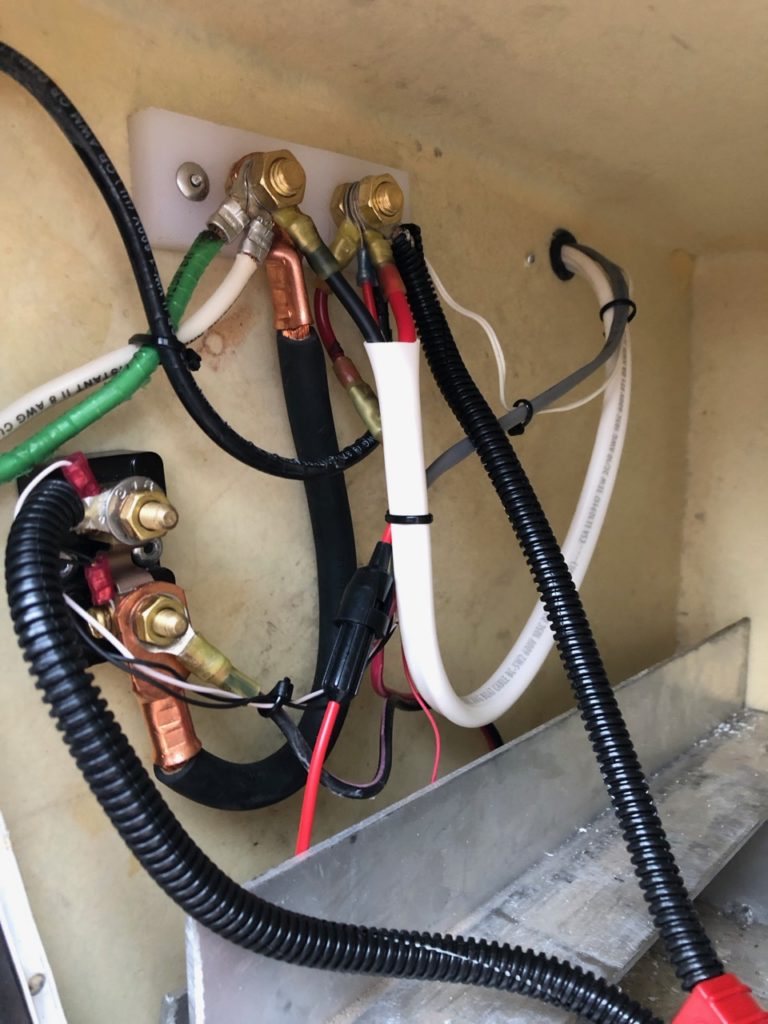
Shunt
A solar panel needs a charger/controller to reduce the 18 volts to what the battery needs to charge. The controller also keeps the battery from overcharging. We could have used the free solar charger/controller that came with the panel but I like to go a little overboard on projects. The Bogart Engineering SC-2030 charger and Tri-metric 2030-RV battery monitor are made in the USA and give us much more information than a stand alone controller. It’s an expensive system at nearly $400, but it shows percentage of battery capacity remaining, amps going in or out, days since the last full charge, and more!
In order to monitor the flow of electricity to and from the battery, a shunt has to be wired in between the battery negative cable and the Casita. After adding the monitoring and communication wires, the system came alive. Since I took the picture of the shunt, I added a 20 amp fuse on the solar wire to protect against a short circuit. I also added a switch at the top of the closet to shut off the panel before disconnecting the battery.
I previously added an flush mount SAE battery connector under the battery box for a trickle charger. It’s the same connector “zamp” and others use for portable solar panels. I’m going to wire it to the solar controller too so I can add a portable panel easily if we need more power.
wiring the charger 
wiring the monitor 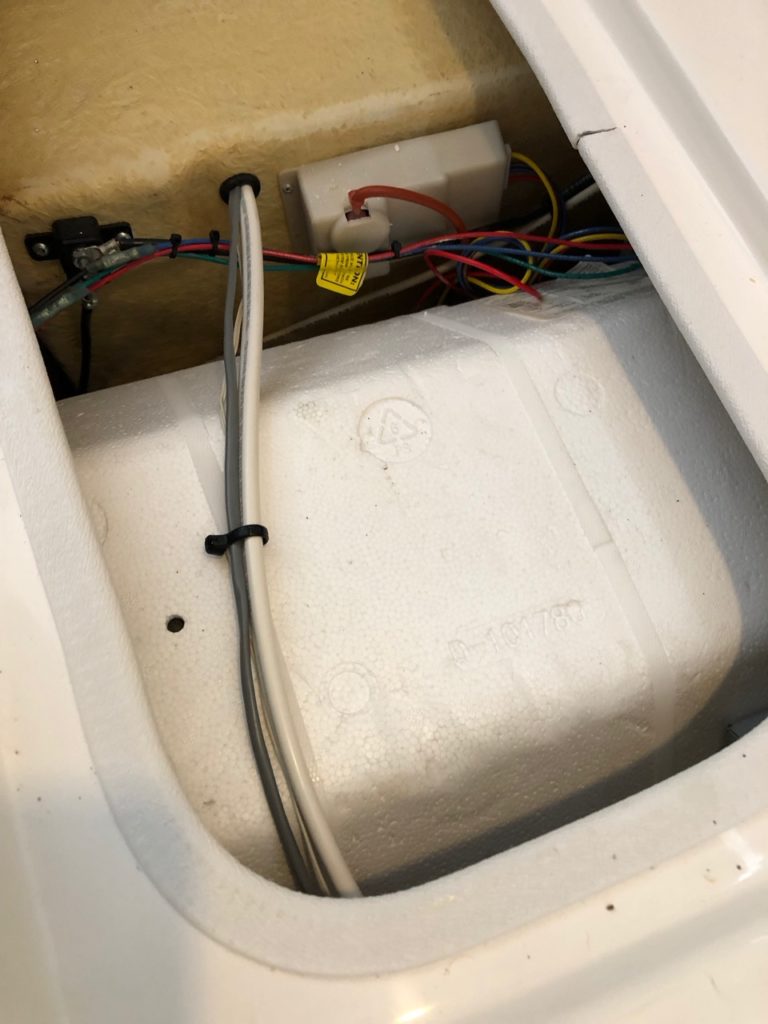
solar to the battery routing 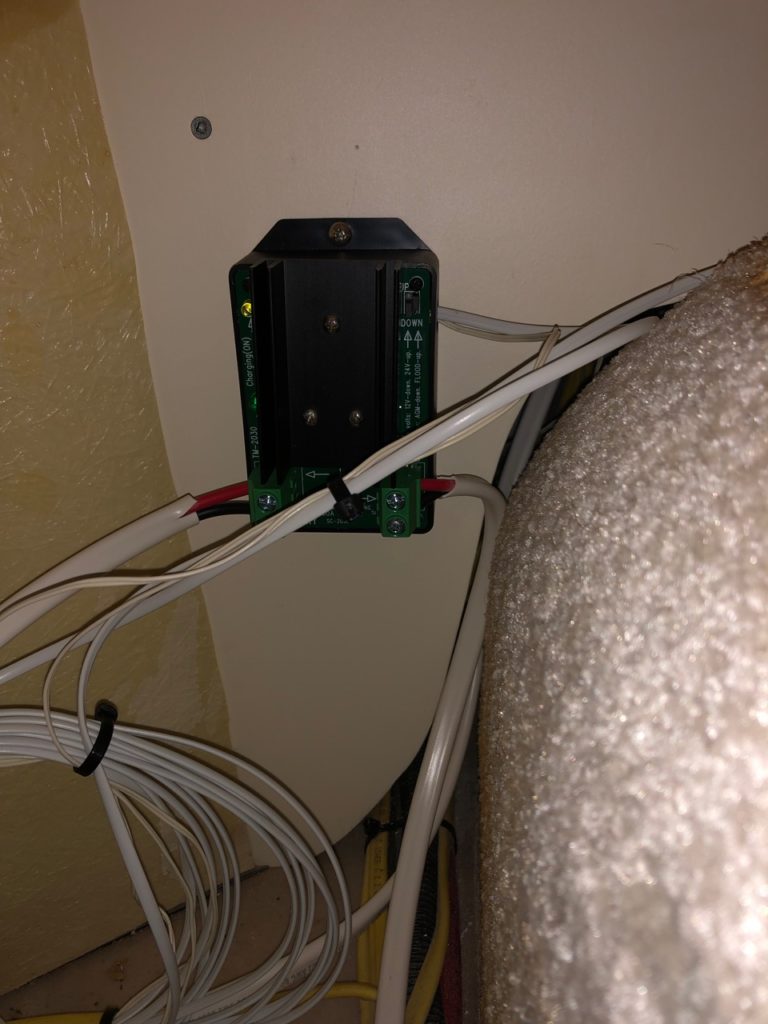
charger mounted under side bench
We driven thousands of miles on the interstate and it held strong (sadly we sold our Casita in 2020).
6 comments
Hi..now that this has been installed for almost six months is there anything different you would do ?
Nice write up, you listed 1952 tape, was that maybe 5952 instead? I was all set to use 4941 3m because AMsolar recommends it. thanks Mitch
Yes it was 5952, I’ll go update the article. Thanks. https://www.mcmaster.com/catalog/125/3583
Mine had approx 2’x4″ side brackets and hardware to allow the 100 watt panel to pivot upwards. It never needed to pivot. It didnt lay as flat to the roof as yours. I believe the bolts on the pivoting arms are what vibrated loose on the side that flipped over rapping the bracket away from the glue…. but I dontvtruly know whether that or the glue gave way. It was Very windy the 4 days I was at Bryce Canyon. I had traveled about 1000 miles.
Did I read correctly that you stood on the roof of your Casita? I thought we weren’t supposed to walk or stand on the roof? Was I told incorrectly?
You can absolutely stand on the Casita roof, especially a 17 footer. Watch out, it slippery and easy to fall plus you don’t want to step on any rivet caps.