

Every year you should flush the water heater and check the condition of the anode. Anodes are made out of either magnesium or aluminum and are “sacrificial”, meaning that the water eats the anode through electrolysis rather than the water heater itself.
Tools and Parts Required:
You need a 1 1/16″ socket, a socket extension, a wrench with a long handle (sometimes they are TIGHT!), teflon tape or pipe dope, a flushing wand, a garden hose, and a replacement anode.
Removing the Anode:
Start by turning off the water heater gas switch. If your heater has an electric heating element, either turn off the water heater circuit breaker, or flip the little black switch hidden behind the gas valve on the exterior of the heater. If the water is hot, give it time to cool down.
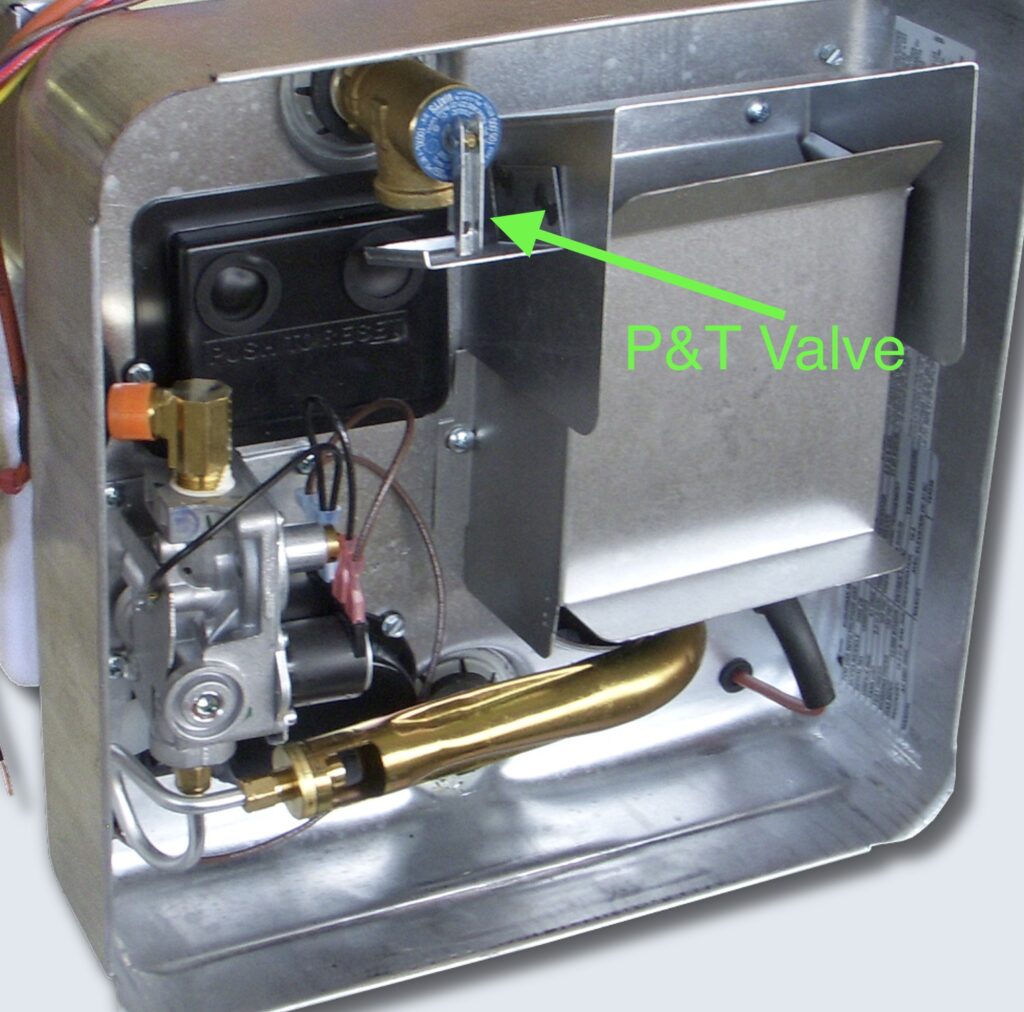 Flip open either the pressure/temperature relief valve (P&T) or a hot water faucet inside, which will bleed off the water pressure in the system and allow air in for a faster draining of the 6 gallon tank.
Failure to relieve the pressure will cause the anode to shoot out of the heater with the sound of a gunshot and spray the frightened handy-person with water and magnesium particles.
Next, use the 1 1/6″ socket wrench to loosen and remove the anode.
Flushing:
Using the water heater wand work it from back to front, then shut it off. Let the water and anode particles (the white flaky stuff) run out. Repeat until nothing but clear water comes out. It could take a while.
Anode:
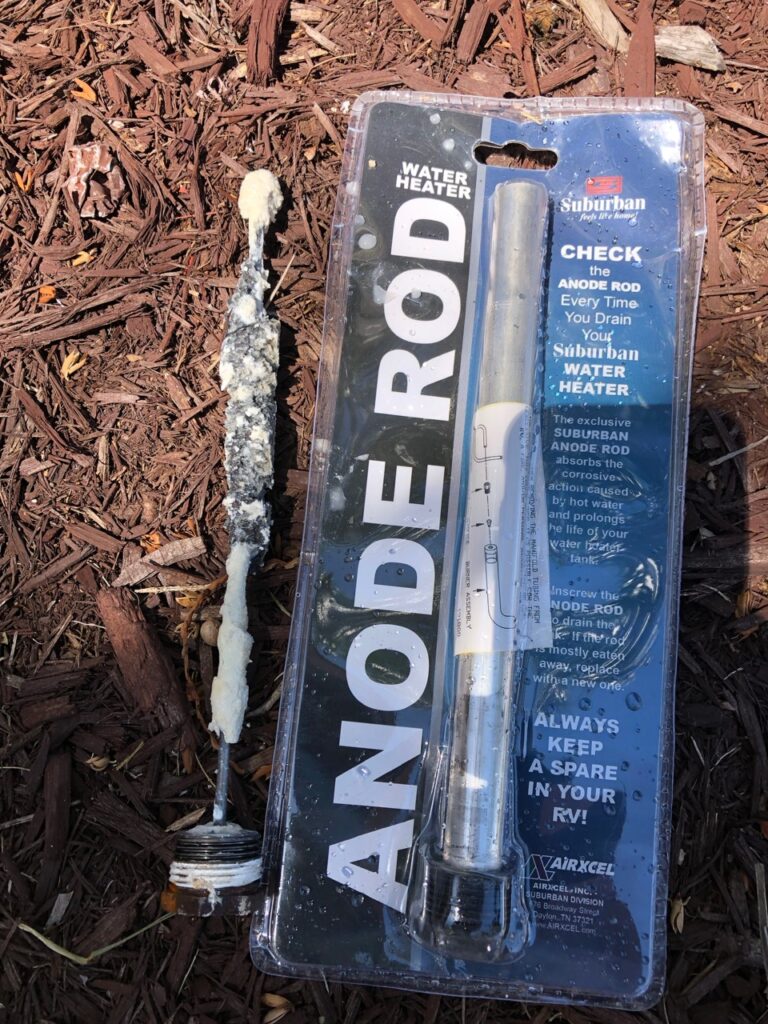
If the anode is over 50% eaten away, it needs to be replaced with a new one. If it looks good, you can reuse it. Apply a few wraps of teflon tape or brush on pipe dope rated for water systems on the threads of the anode. Insert it fully and while pushing on the end of the anode, slowly turn it with just fingers until it threads in. It should go several turns before tightening up. If it binds right away, it’s probably cross-threading.
Refilling:
With the P&T valve still open, turn on the water supply to the Casita and let it fill up until water spurts out the P&T valve. Close the valve and go inside and turn on a hot water spigot until all the air is out of the lines. Now you can turn on the water heater and relax for another year!
2 comments
Clearly and concise w/ very good illustrations. Thanks for educating us. Appreciate it.
Thank you so much, I have a lot to learn.