

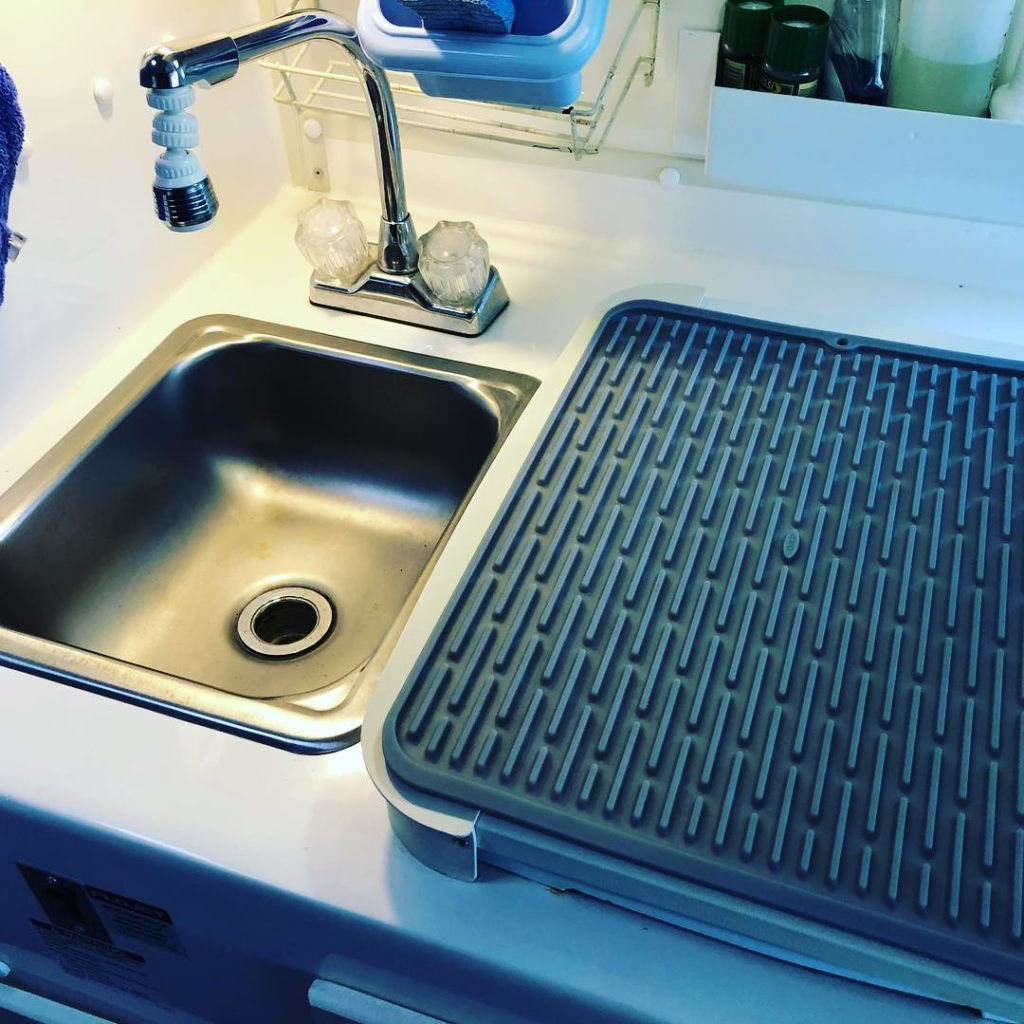
Replace the shallow kitchen sink with this restaurant quality deep sink and high rise faucet. The Krowne HS-1419 includes a heavy duty metal faucet and a drain basket. The installation requires cutting the existing sink opening about 1/2″ deeper, drilling 4 holes for the mounting studs, and drilling new holes for the faucet. The water lines will reach without modification, but the drain needs to be modified. I used Little House Custom’s kitchen Hepvo valve kit which removes the P-trap to keep useable storage in the under-sink cabinet.

Start by loosening the 6 screws under the kitchen sink, remove the P-trap, water lines and faucet. Pull the sink out and lay the new sink in place. Mark across the back where the fiberglass needs to be cut. I use a cut out tool and roto-zip bits.
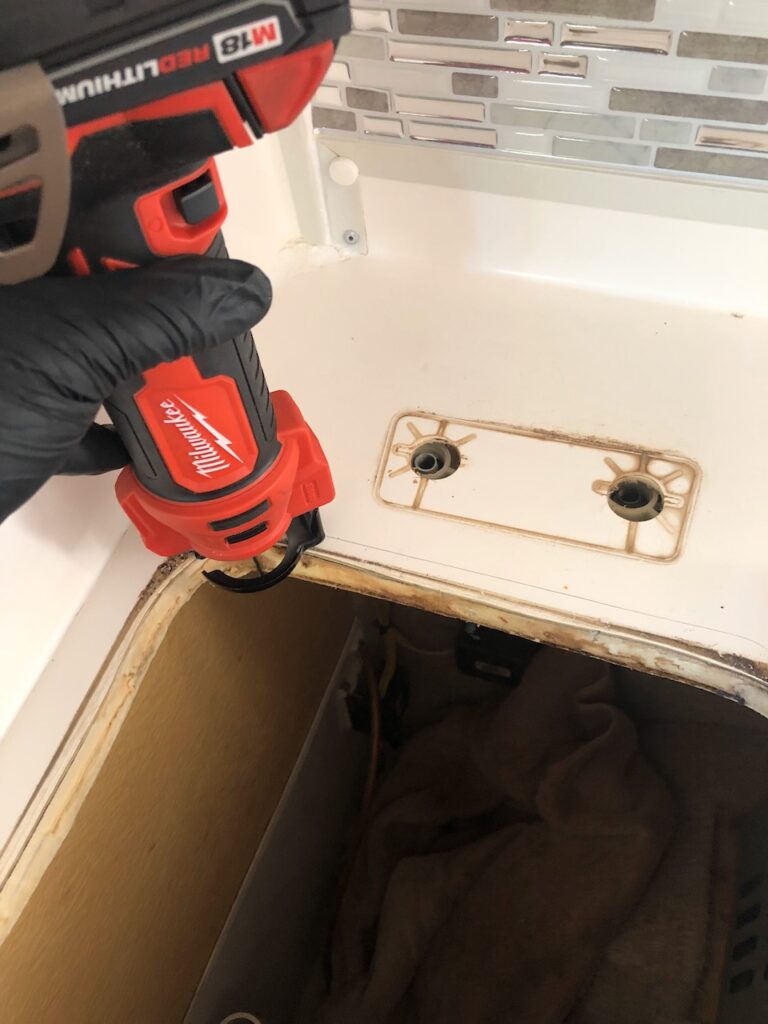
Once the sink will sit down so the studs lay on the counter, mark them and drill 1/4″ holes. The sink should now lay flat. Pencil in the circles for the faucet and drill the holes.
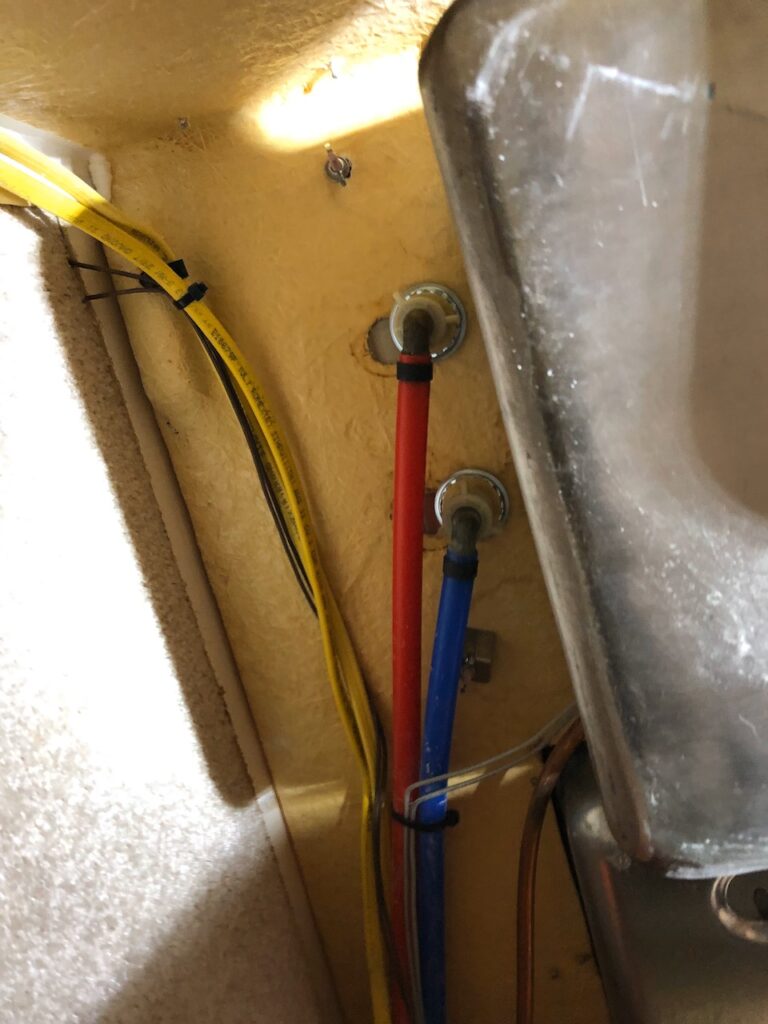
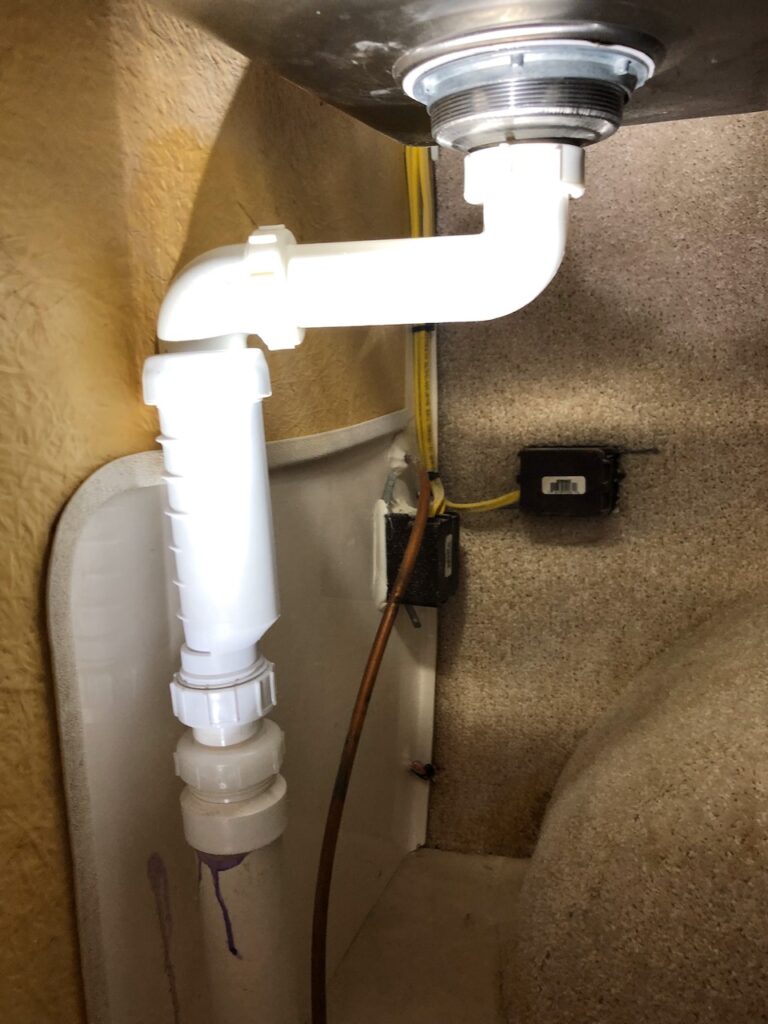
Now for the fun part, it’s a very tight fit to crawl under the sink through the cabinet door opening. Reaching up from underneath install the 4 wing nuts to hold down the sink. Next attach the plumbing lines, and install the kitchen sink Hepvo valve. That requires cutting the drain pipe to the appropriate height and lining everything up before glueing the PVC fitting and screwing the rest together.
I’ve now done 6 of these sinks and here’s an update: Instead of 1″ holes for the faucet, I drill 2″ holes and pre-install the faucet to the sink before dropping the whole unit in. It’s much easier and there’s less chance of a leak. I also silicone the rubber gasket to the drain on the sink to help everything stay sealed. Finally, where the PVC drain pipe goes through the floor, run a bead of silicone around that so the weight of the Hepvo valve doesn’t push the plumbing down through the floor. The sink might not sit completely flat to the countertop, so run a bead of white silicone around the edge and you are done!
29 comments
You’re amazing. Ty we want to come see ya
Hi, Greg! I’d like to try this on a 2017 Independence Deluxe. Have you tried this, or do you know anybody who has, so I can get advice, directions, and maybe pictures? Thanks, love your work!!!
Nope I have not. I’ve looked at a few Independence and Liberty’s with the “drivers side” kitchen and I don’t think it will work. The spacing of the faucet doesn’t match where the Krowne sink’s location is. Also if those layouts have a furnace, there’s no room for it.
Where did you get the faucet handles. The sink referenced and link comes with regular turn handles.
The faucet and handles come with the Krowne sink.
In photo #5 showing the reattachment of the water lines, what is the plastic or silicone substance shown on the back bottom underside of the sink? I suspect you did something to soundproof the sink. My Krowne sink had nothing on the bottom. Thanks.
There’s nothing on the sink bottom on mine either. I think the flash is reflecting scuffs in the stainless steel to make it look like a coating.
I see that now. Thanks for the quick response. I am putting mine in today.
Water supply line, any need to replace any washers at attachment point?
No need unless they leak after the installation. Get them as tight as you can by hand. Removing the drawer will give you better access.
I could not get into the cabinet. My wife wanted it done so badly that she crawled in, attached the lines, and tightened them with a basin wrench. Perfect job and no leaks.
I did have an issue with the basin nut not sealing on the Krowne and had to buy a thicker rubber washer. All done. Thanks so much for your instructions and support.
Glad it worked out for you. I also figured I needed thicker washers with some silicone on there to seal the drain to the basin. Great work, it’s a tight fit and not an easy job.
That is awesome! So much so, I ordered the sink and hepvo valve today. I was wondering if you calk under the edges of the sink. If so, what type of calk? Btw, hope your family is safe and healthy. It appears we are about to have similar problems stateside.
Best regards,
Ed
You can use “plumbers putty” under the sink flange. It’s like play-doh that you roll out and stick around the edges. Once the sink is bolted in, it’ll smoosh out and you can cut it with a plastic knife. Or wait until after the install and use white silicone bath caulk around the edge.
Hey Greg thanks for this write up and pics. Doing my sink Friday. In the sink parts bag with the wing nuts for the 4 bolts there are several L-shaped washers. Do you use these?
Thanks Again!
Nope, not needed.
Hey Greg. One last question.
Using a 2” hole eliminates the need for the 2nd silver faucet nut correct? Just use the brass one? The sliver is not even 2” round.
Thanks again
I’m going off memory, but you put the rubber washer, silver ring, then brass nut on each spigot post. Then it drops through the 2″ holes.
Hit a bit of a snag, the front bolts go through a double sandwich of fiberglass that is 1 &3/8″ and the bolt length is 1 & 1/4″.
Anyone encounter this?
Wow haven’t seen that before. Maybe a Forster drill bit to relieve the underside for the wing nut?
I know this is an older post but wanted to add to this. Yes, I have encountered the same issue where the front bolts aren’t long enough to install the nut. Unfortunately, simply relieving the hole from the underside will not fix this as this will remove supporting fiberglass and leave the nut to secure the bolt on the very soft filler material. How did you solve the issue?
I’ve done about 5 sinks and haven’t had this issue. One solution is to add a threaded sleeve and a piece of all thread to make it longer. That would require making the holes a little bit bigger, so add some fat washers under the wing nuts.
So, I ended up drilling out a 1/2 steel rod I had laying around the shop, tapped it, and then used a lathe to reduce the diameter a bit to keep from having to enlarge the hole in the counter too much. Then I drill out a nut and slid it over the rod and welded it. I fit a washer over it and run it up to secure the sink to the bottom of the counter. Had to make two, but it worked. More work than I wanted to do, but couldn’t figure out a better way.
In any case, the project finished up well. Thanks for your write-up, it provided a good guide to get this done.
Decided to use the 2″ bit for the underside fiberglass to have plenty of room for the wing nut and washer, I’ll know soon.
Also my Krowne sink is not flush, warped up from the ends to the middle. 🙁
Thanks Greg! I installed this sink on my FD today. It makes a world of difference. I also found that the sink is not flush but I used some clear silicone around the outside to prevent water from going under from the edge. Figuring out the plumbing for the sewer was the hardest part which means it wasn’t that hard.
Greg: We hava a SD with the furnace installed. Will this sink’faucet combination fit, or is the furnace an issue?
Yes. The furnace is only an issue with kitchens on the “drivers” side, not curb side like a spirit.
Do you know of an exact kitchen sink replacement or better yet one that is the same length and width but deeper? Would this one work in that regard? https://www.katom.com/002-1319.html
I don’t have the tools or expertise to expand the hole. My sink is corroding around the drain. I would like to replace the sink and get a higher gooseneck faucet (like Casita has on their store site) and the hepvo valve.
No, all the ones I’ve looked into needed some cutting to fit.