

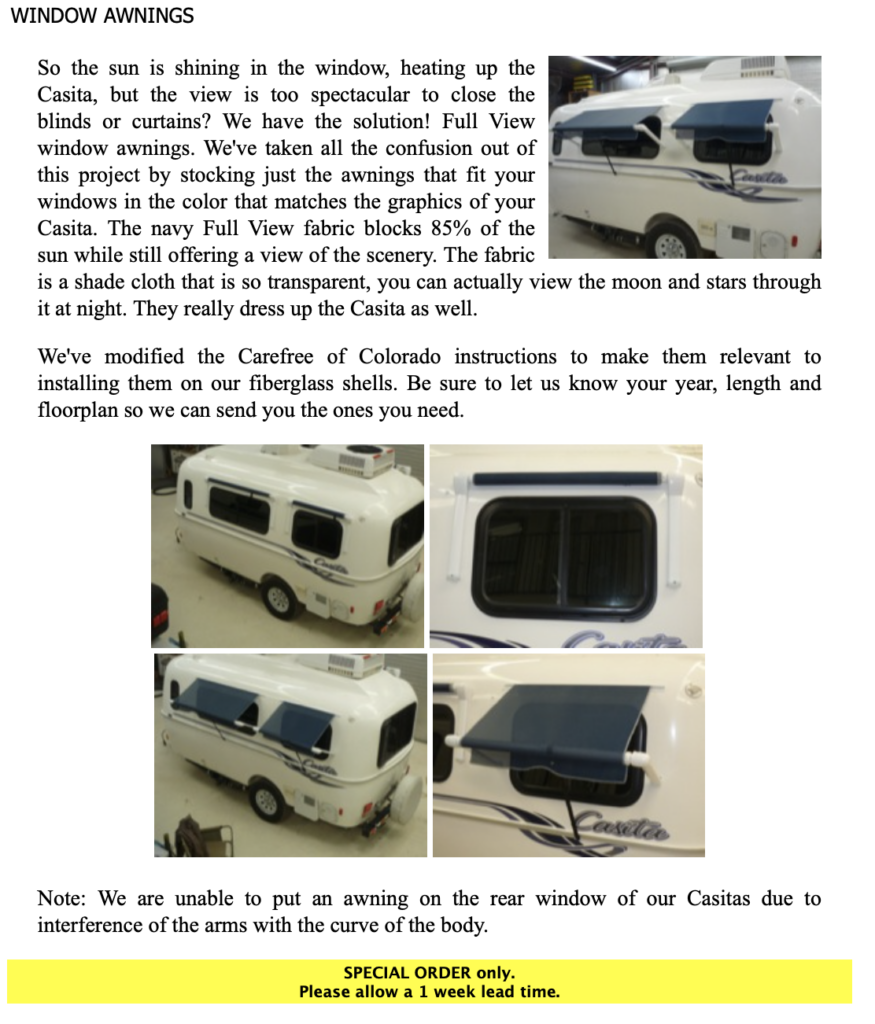
Window awnings add a touch of class and are effective at blocking sunlight and offering some extra privacy. To deploy, pull the strap to unroll the awning and hook the end to the “foot”. They are spring loaded and roll up automatically when the strap is unhooked.
These Carefree of Colorado brand awnings are available specially modified to fit Casitas from Little House Customs. They are available in 2 lengths depending on your layout. Usually installed on the “road side” of the Casita, if you don’t have a full size awning, you can put one on the “curb side” as well. They won’t work on the rear window however.
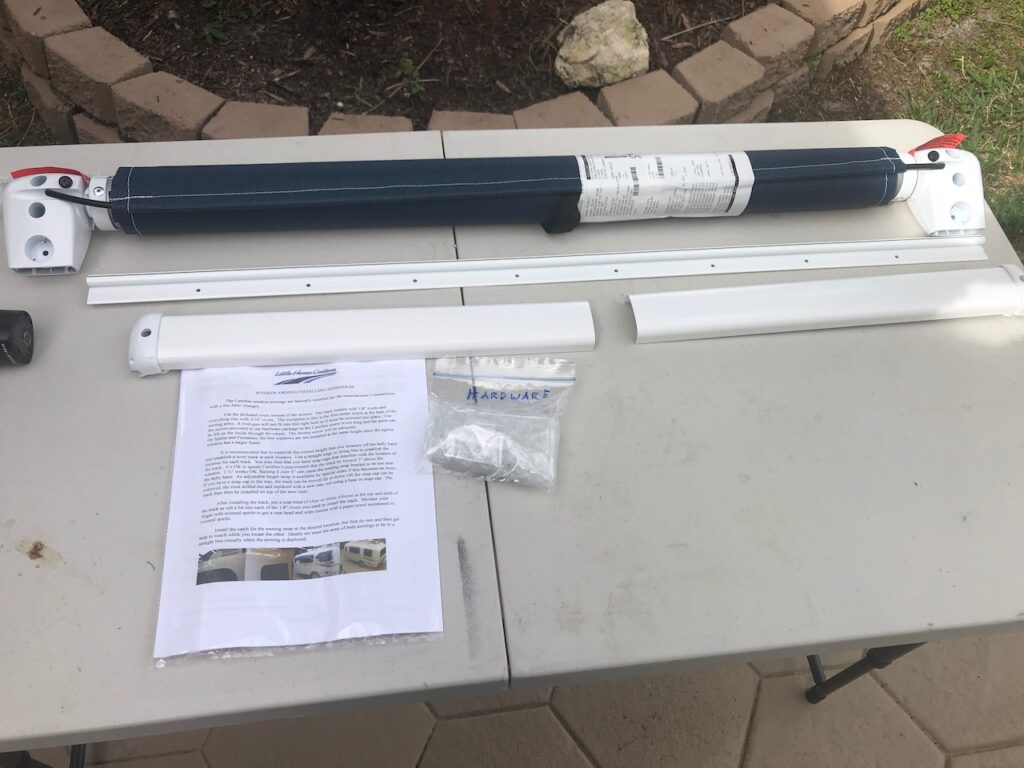
Here’s the awning, header rail, hardware bag, and detailed instructions from LHC.
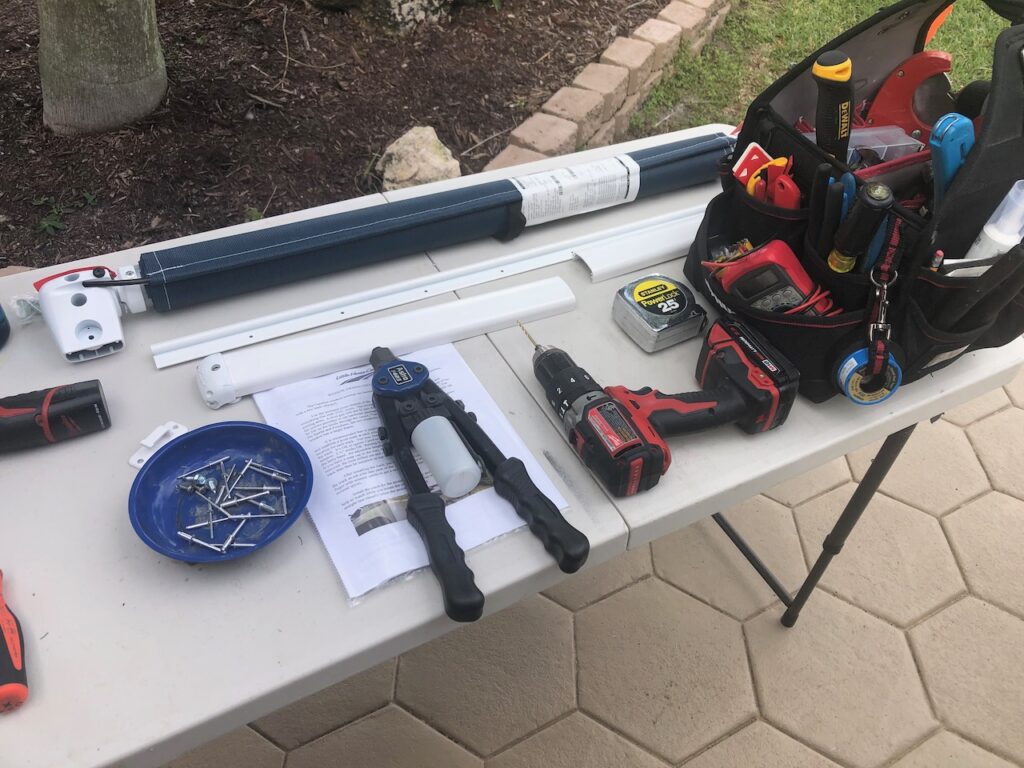
Time to assemble the tools. You need a good rivet gun, I use the Astro 1423. A drill with 1/8″ and 3/16″ bits, screw driver, pencil, measuring tape, and silicone sealant. A step stool and a helper are nice to have.
Following the instructions, mark where you want the header rail. Centered on the window, with the correct spacing above it, and measure from each end to the belly band to make sure it will be level.
Tip: The egress window is a different height than the side window, so if you want the awnings level all the way across, measure from the belly band, not the top of the windows.
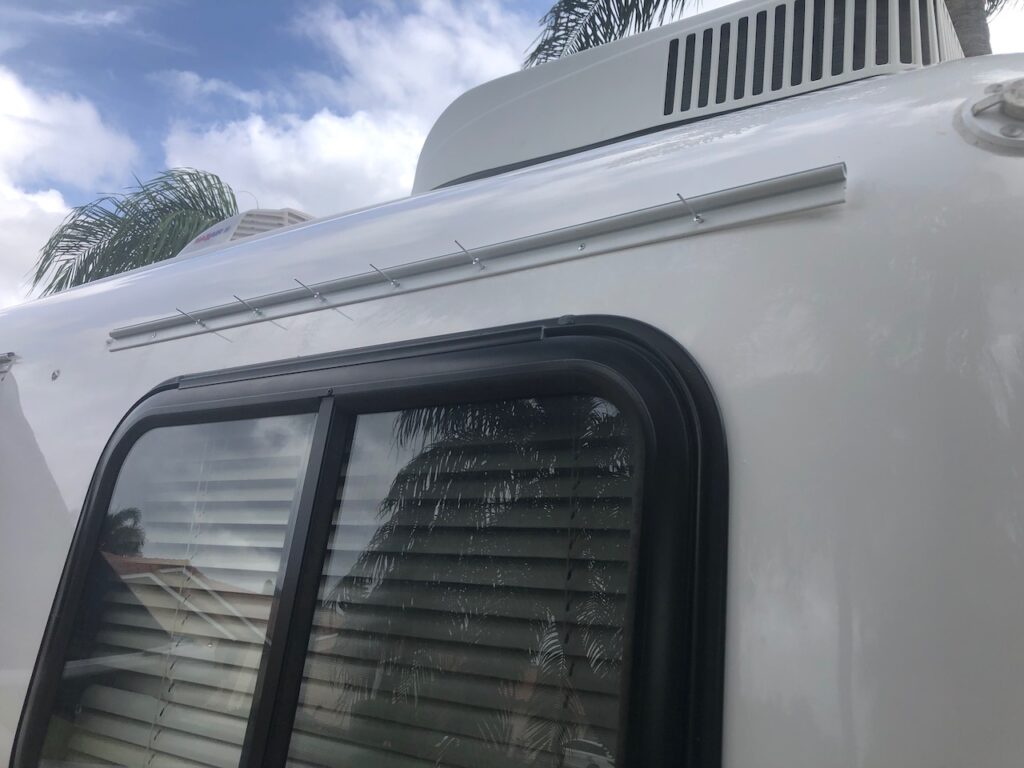
Here the header is on it’s way to being installed. Drill and rivet at one end, then double check for level and rivet the other end. Now proceed to drill the remaining holes and rivet across. Dab a little silicone on each rivet as you insert them. At the very rear you can see the track is sticking out. Carefully push it against the Casita and drill one last hole at the end and the rivet will hold it tight. Run a bead of silicone across the top.
Next slide the awning into the track and figure out where the spring loaded arms will lay. Drill the 3 holes. 2 are large 3/16″ rivets, the bottom is a screw because the pocket is too deep for a rivet gun to fit. Silicone them. Stick on the little bumpers to keep the arms from hitting the fiberglass. The instructions call to insert a screw into the awning track to capture the material, I find this step unnessessary.
Have a helper pull out the awning and then set the hold down foot where it needs to be. Drill, rivet, and seal the hold down. Congratulations! We’re done.
Below is a screen shot of the awnings on LHC’s online store.
4 comments
I put these awnings on my Casita in 2018 and I LOVE them. I bought an opaque fabric instead of the type they offer at LHC and had my local RV dealer install them for me. They did all the measuring and ordering for me. They are expensive, but honestly they make it so easy to pull out some shade and put them away in two seconds. They are super durable and really good quality. I have an ABC Canopy I use for outside shade away from my Casita. That way, if I want to go to bed, people aren’t staying under my awning while I’m ready to hit the hay.
what did you use for your logo on your casita. I want to do some art work on mine, but not sure how to go about it.
That’s just our logo superimposed on the photo. But for real graphics go to a sign store and use marine grade vinyl. They have computers that can cut out the decals.
I just reinstalled a set of these awnings on my Spirit Deluxe, thanks to Greg’s instructions and the previous owners of LHC. However, the tension needs tightening on one of them and I haven’t been able to find instructions on the internet, does anyone know how to adjust the tension? Thx!