The Fast Gray Modification
The Casita’s 32 gallon gray water tank is notorious for slow draining and leaving gallons of water trapped after dumping. Emptying can take up to 10 minutes, which is not fun at crowded dump stations. The tank can seem full before it is due to the vent design.
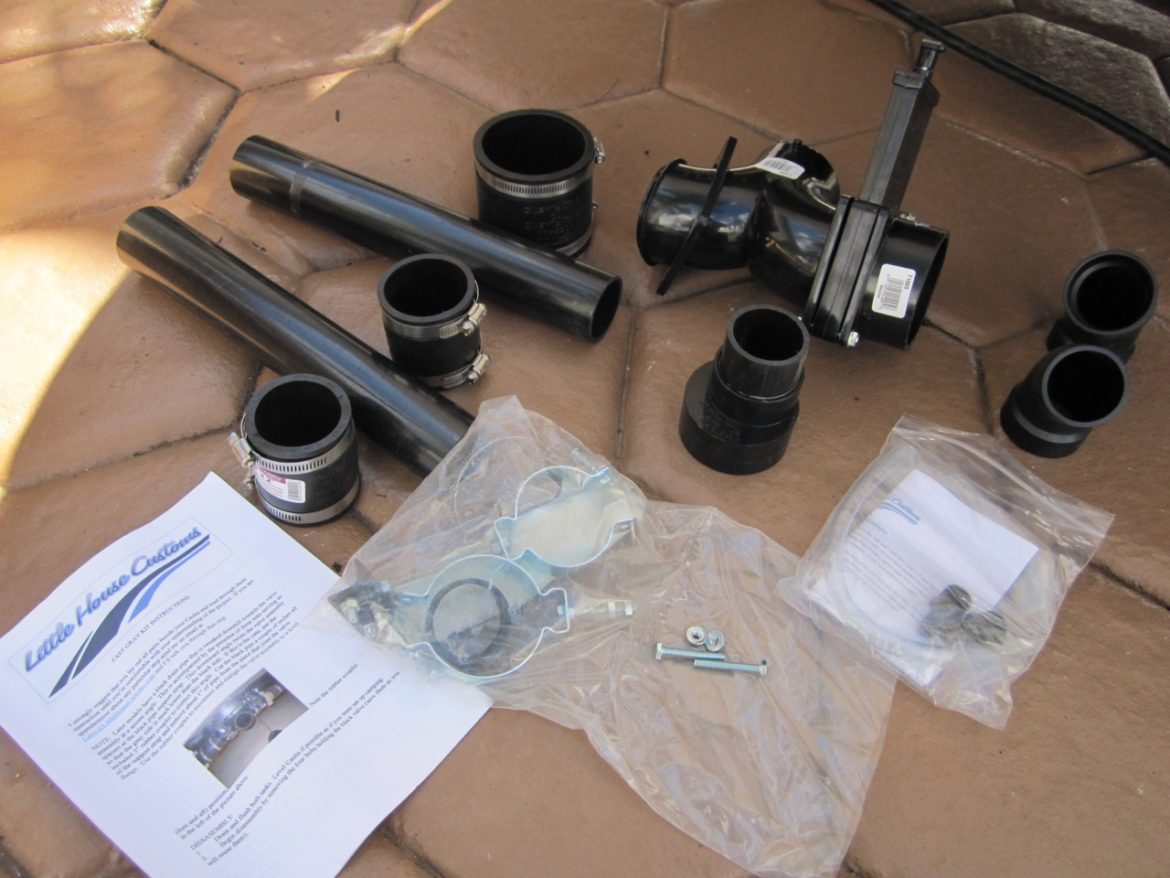
LHC (Little House Customs) came up with a solution called the “Fast Gray Kit”. It replaces the existing plumbing allowing the tank to empty in 2-3 minutes. The “Vent Mod” adds a vent to the grey tank to help it hold its full capacity.
Installation:
2018+ models have an improvement in which Casita upgraded the grey valve to a 3″, but the plumbing still has the same issues. LHC sells a cheaper “Fast Grey Finisher” kit which doesn’t include the valve or Wye as they are not needed.
This was a fairly involved project requiring some special tools. I needed a 11/16″ drill bit, 1/2″ pipe thread tap, a Sawzall, ABS pipe cement, and some hand tools. Luckily I had everything on-hand in our well stocked garage.
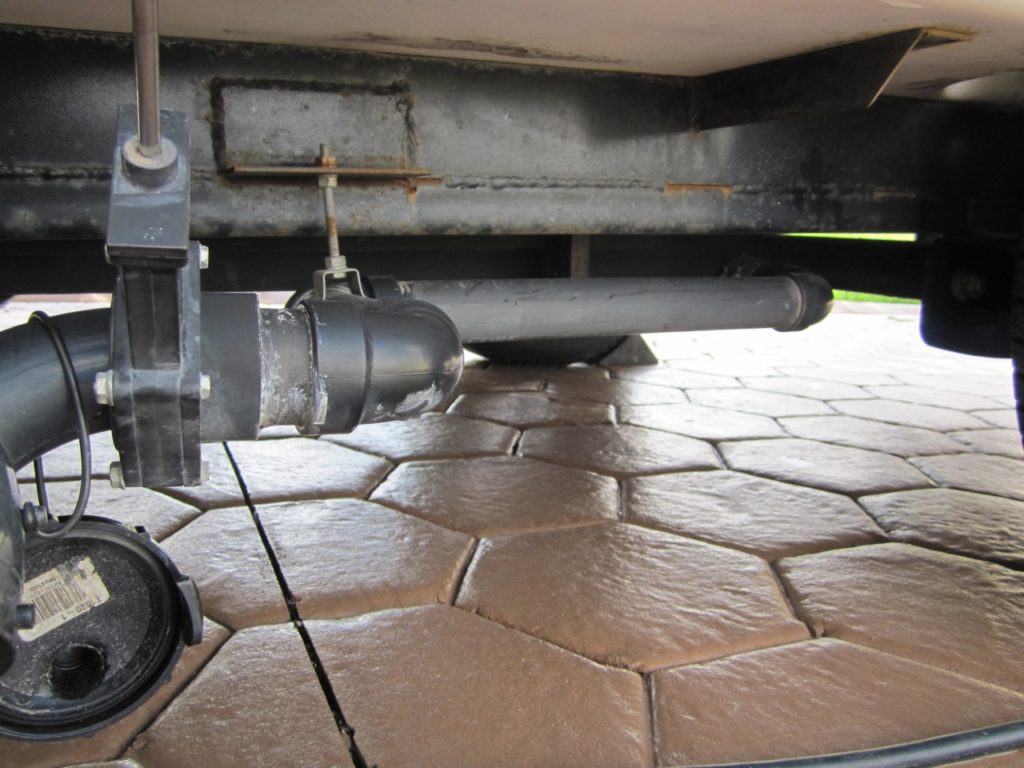
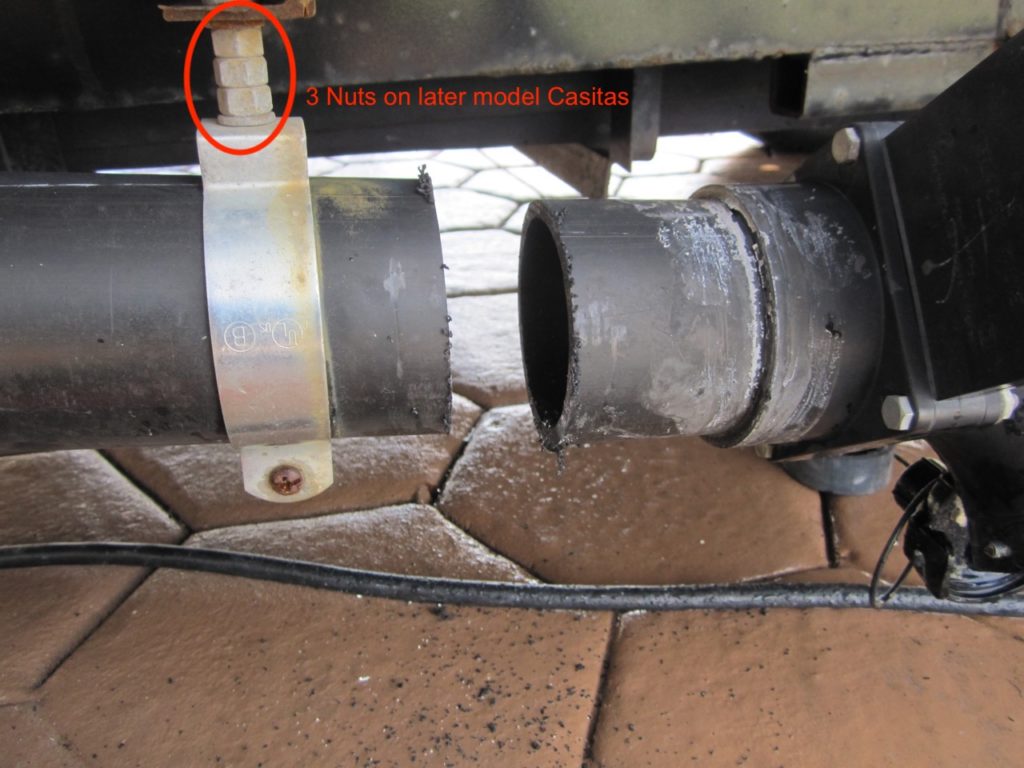
The instructions state that if you have a late model Casita with 3 nuts on the black water drain, a 1″ section needs to be cut out. The nuts push the black tank drain and valve assembly down at a steeper angle, which needs to be addressed. A rubber connector is installed to help level out the valve assembly. I double-checked that the black tank was empty before cutting and I’m glad I did or I would have been covered in a gallon of Porta-pak blue liquid.
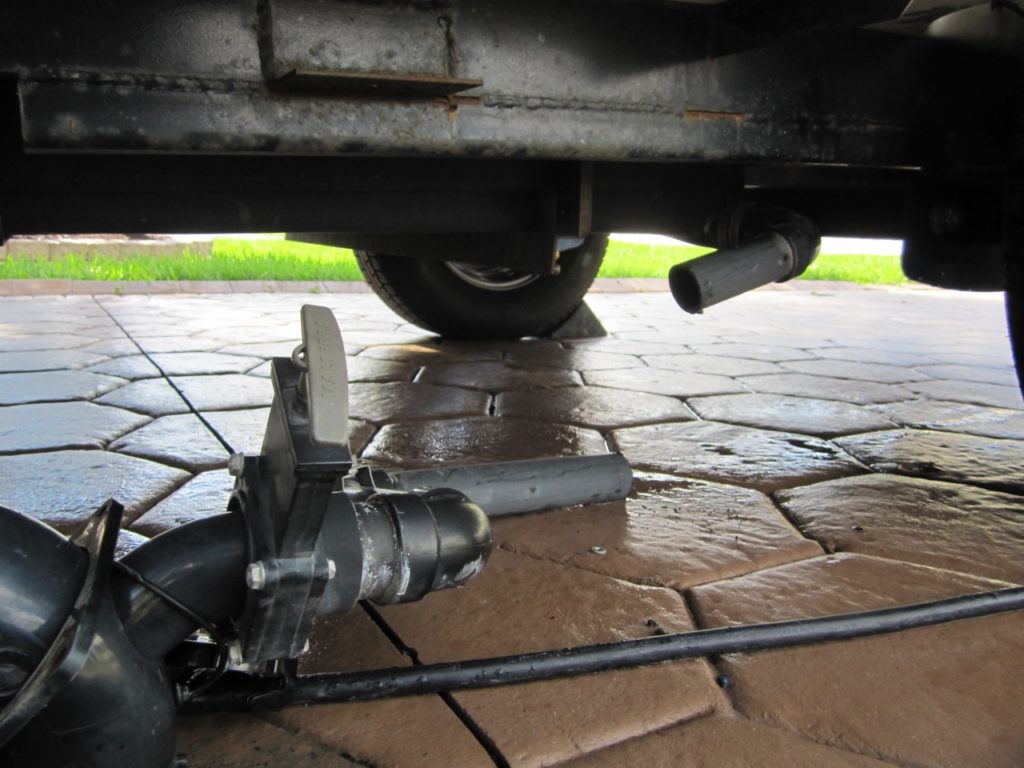
I unbolted the black water valve from the drain assembly, cut the gray water pipe, and dropped the assembly free.
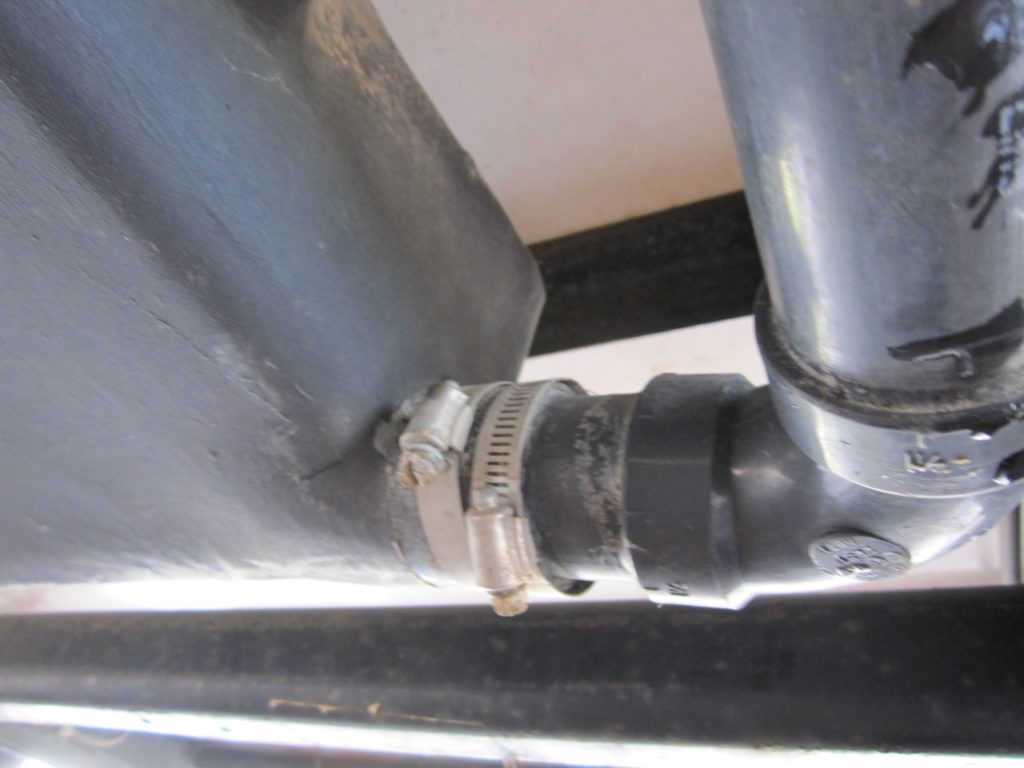
The double hose clamps at the gray tank drain are loosened and the pipe is ready to be pulled from the tank. It’s glued in place, and takes a good twist and pull to remove.
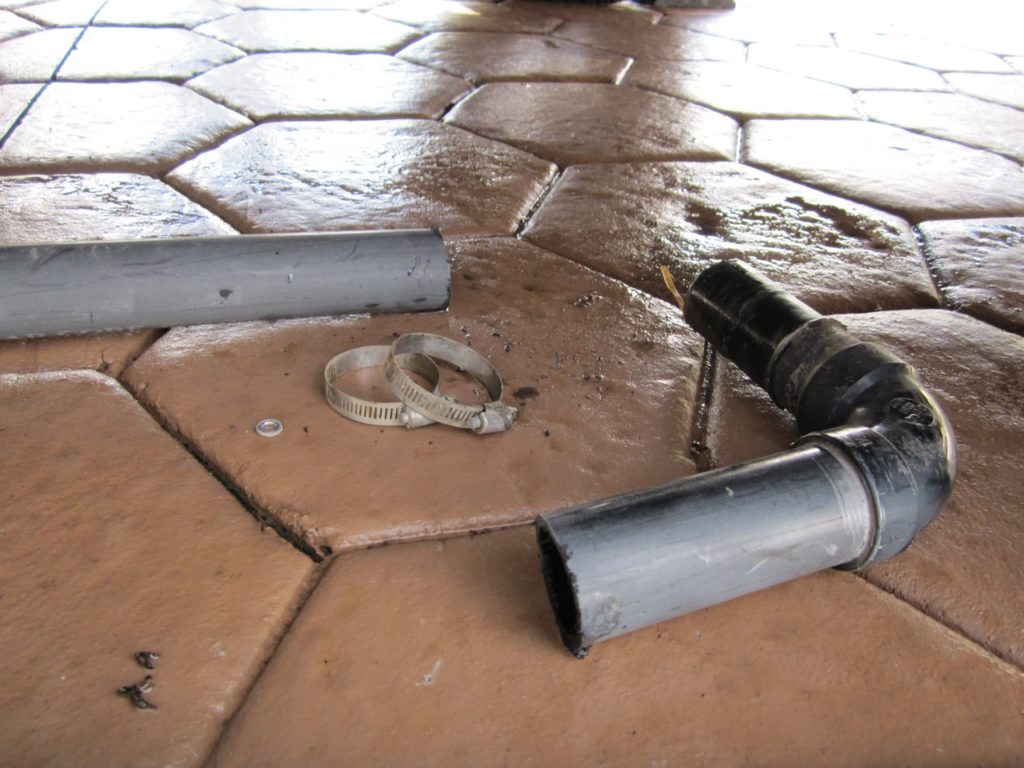
The piece on the right is what pulled free from the tank.
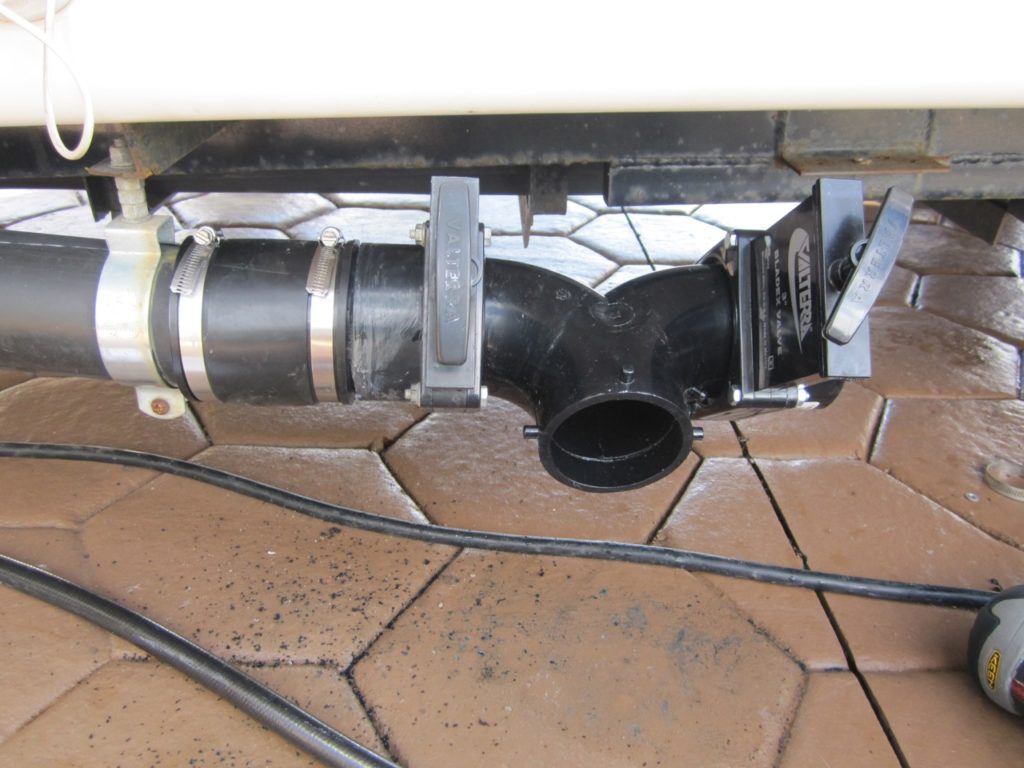
The existing black water valve and new gray water valve are attached to either side of the new “wye” with 8 bolts. I installed the bolts with the nuts facing outwards to avoid sharp edges while dumping the tanks.
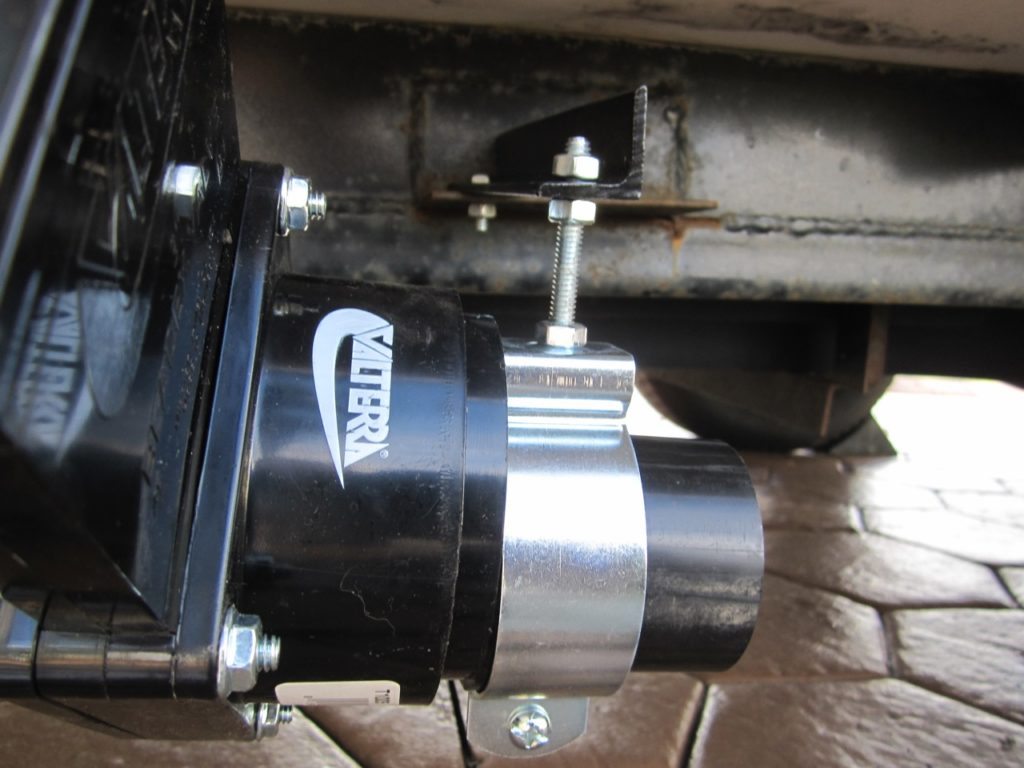
I glued the offset adapter into the gray valve and assembled the hanger around the adapter. The offset allows the water pipe to come into the valve at a very low angle, helping drainage. The included angle iron mounting bracket was bolted to a pre-existing hole in the Casita’s frame.
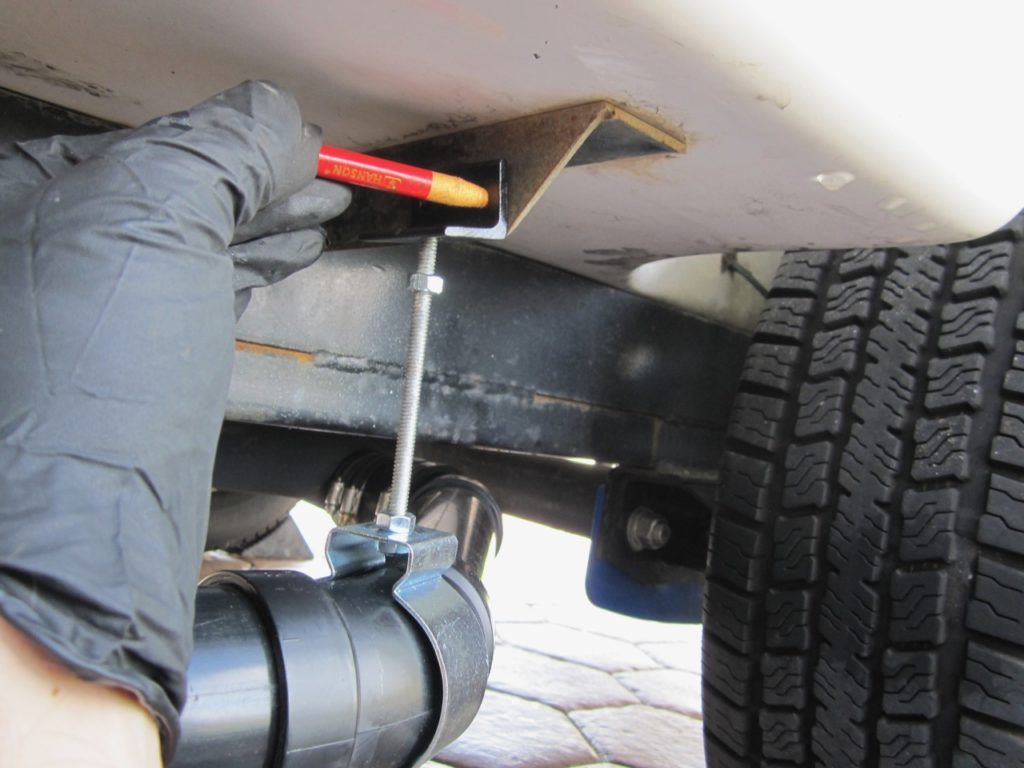
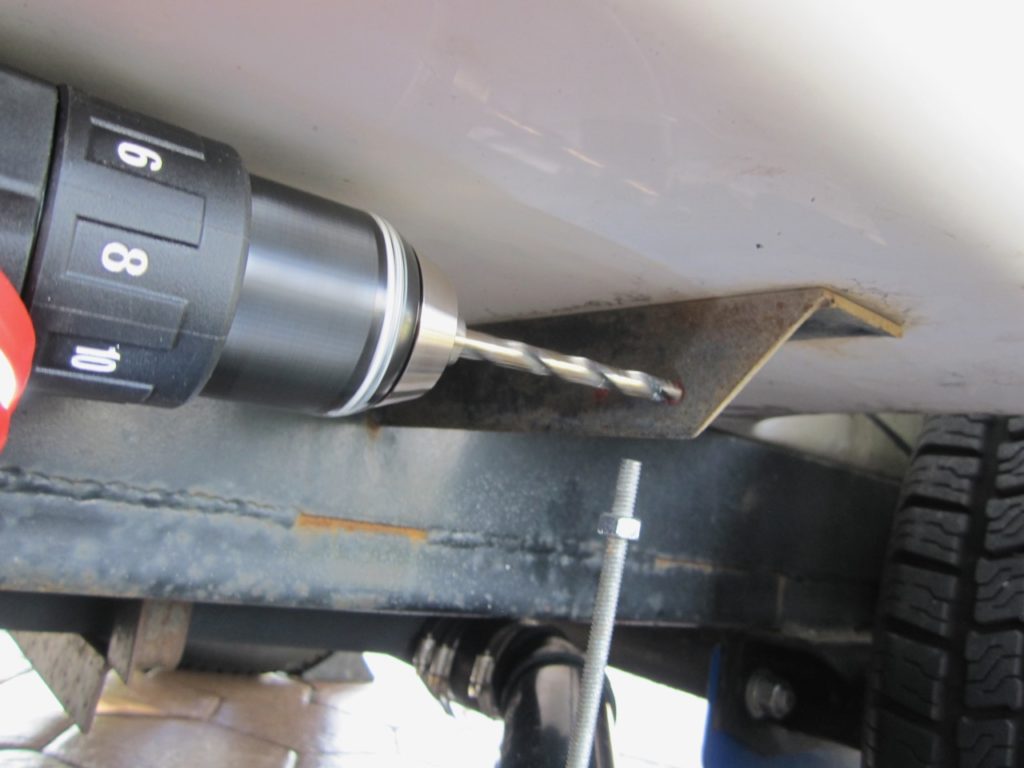
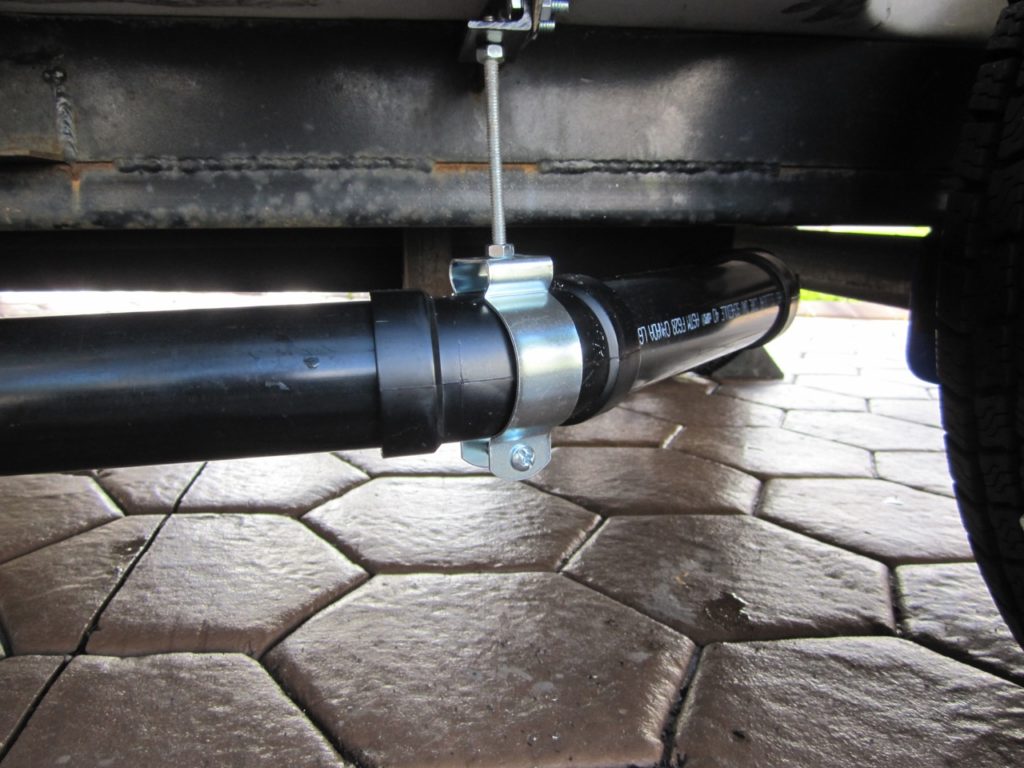
I attached the 45 degree “street” elbow to the tank with a rubber coupler and 3 hose clamps. The hardest part was mocking up the 2 pieces of ABS pipe and the 45 degree elbow to see how long each piece needed to be. After “eye’ing” it the best I could, I cut them to length and glued them together. Lastly, a second hanger on the drain was marked, drilled, and bolted to the Casita’s frame. Note the white printing on the pipe, I should have turned the pipe so it wasn’t visible.
Plumbing tip: A “street” elbow is male on one side and female on the other side. A standard elbow is female on both ends.
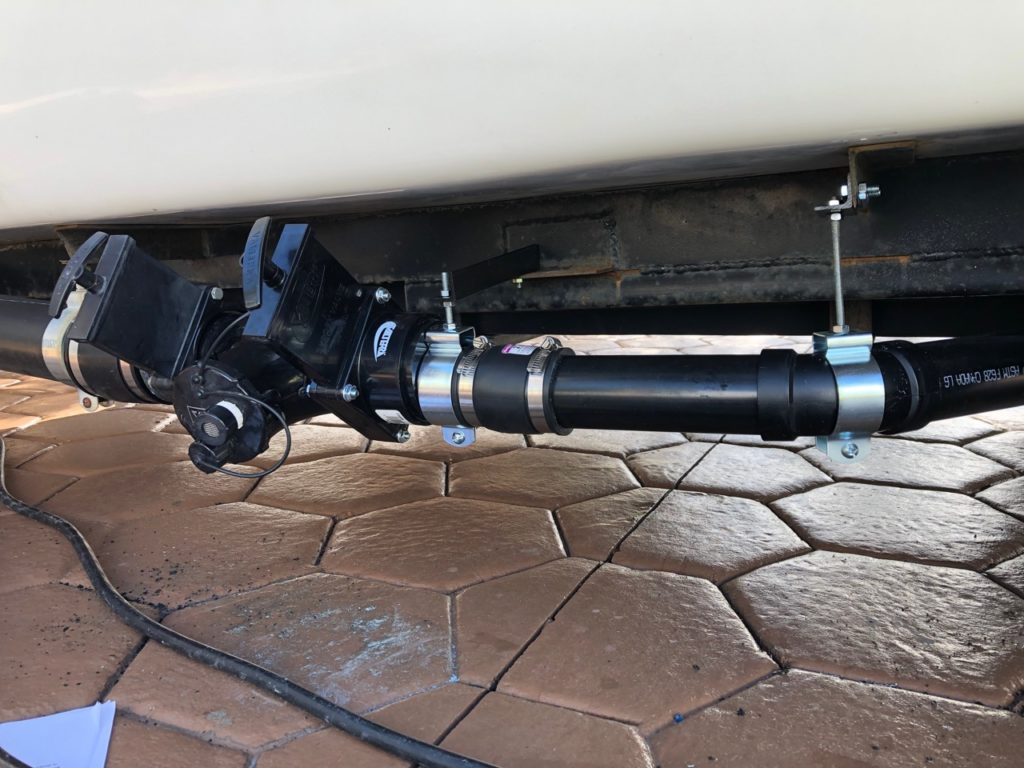
Here’s the finished set up. I adjusted the hangers and clamps so the assembly is on a gradual slope to the “wye” and everything was tightened down. With the new valve assembly, the “wye” doesn’t rotate up and down like the old set up. It’s fixed at an angle that allows full drainage, yet not any lower than the bottom of the valves. This eliminates premature wear on the rubber seals and helps prevent leaks in the future.
Vent Modification
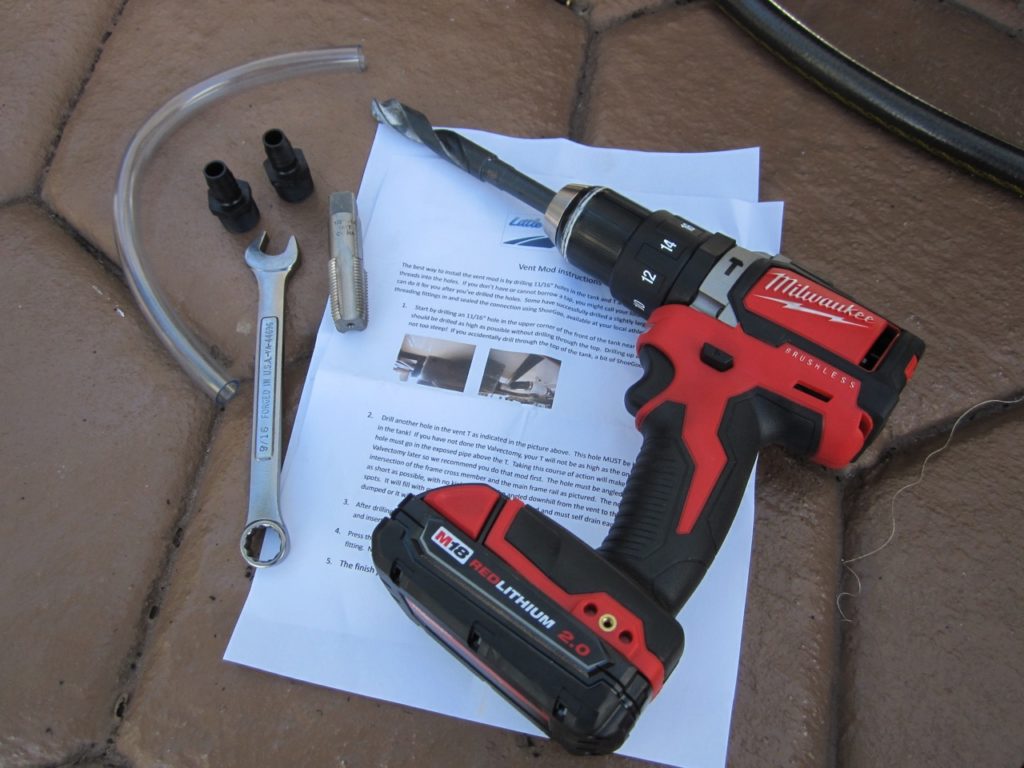
This modification lets the tank expel trapped air and fill to full capacity.
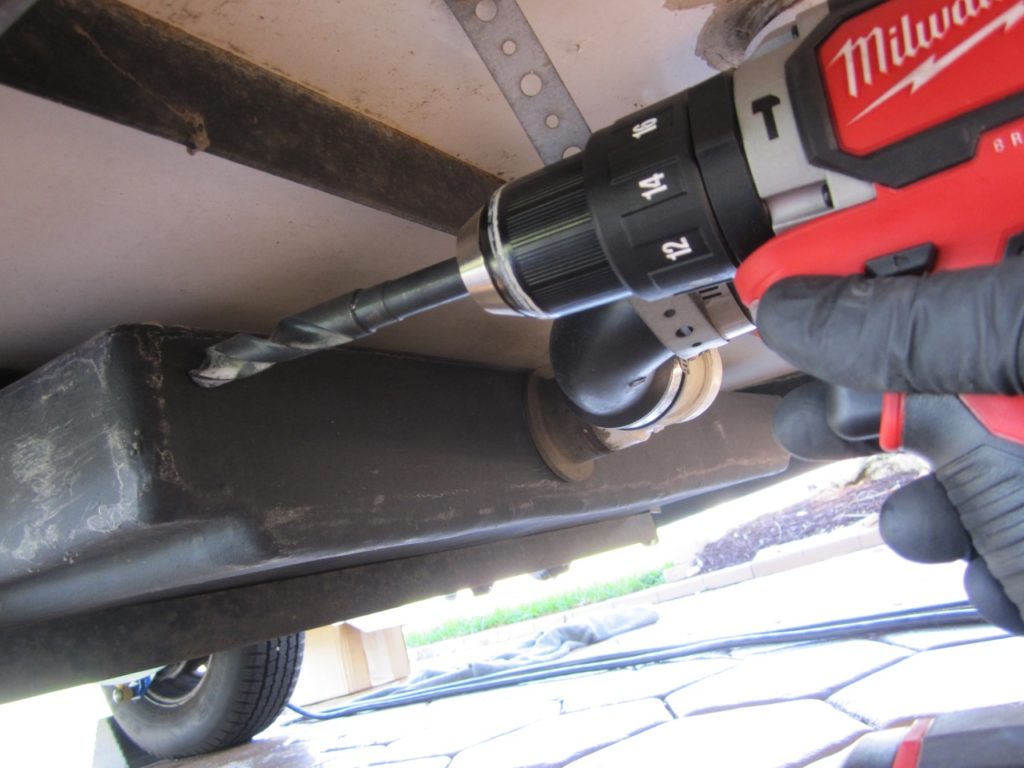
Drilling the tank was easy. Unlike the drill bit pictured, I recommend a step bit (also called a uni-bit) which is better for thin plastic.
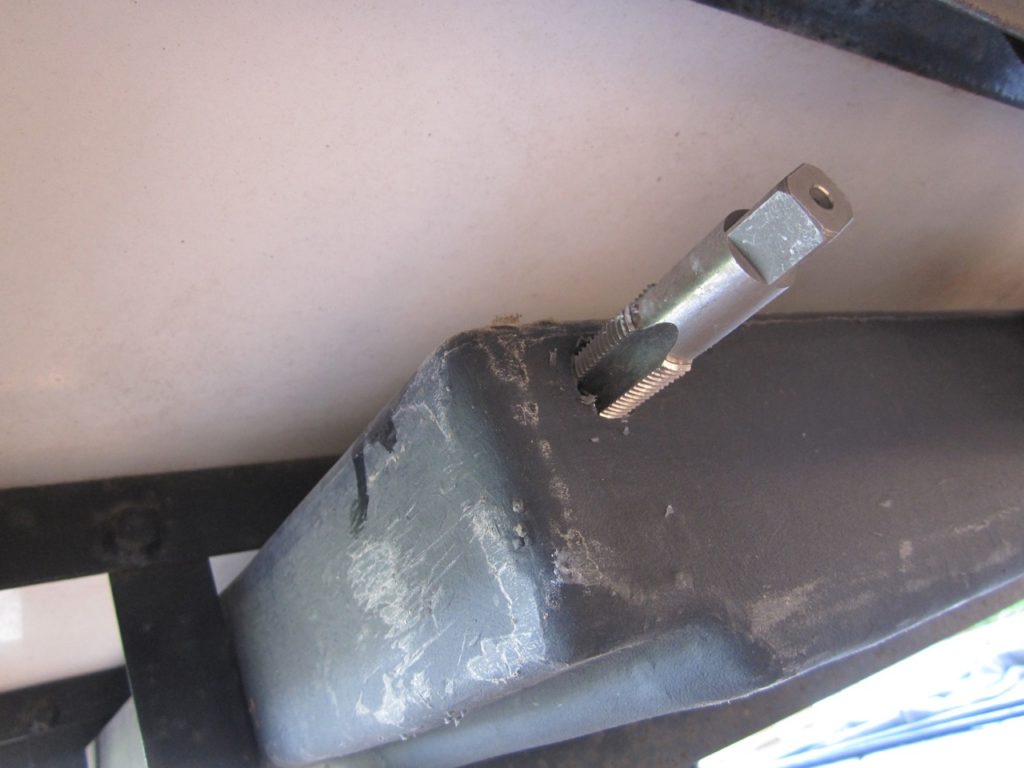
The tap is tapered so just cut the threads and stop, otherwise the hole will be too big. I used a 9/16″ wrench to turn the tap because it was too close to the floor to use a proper tap handle.
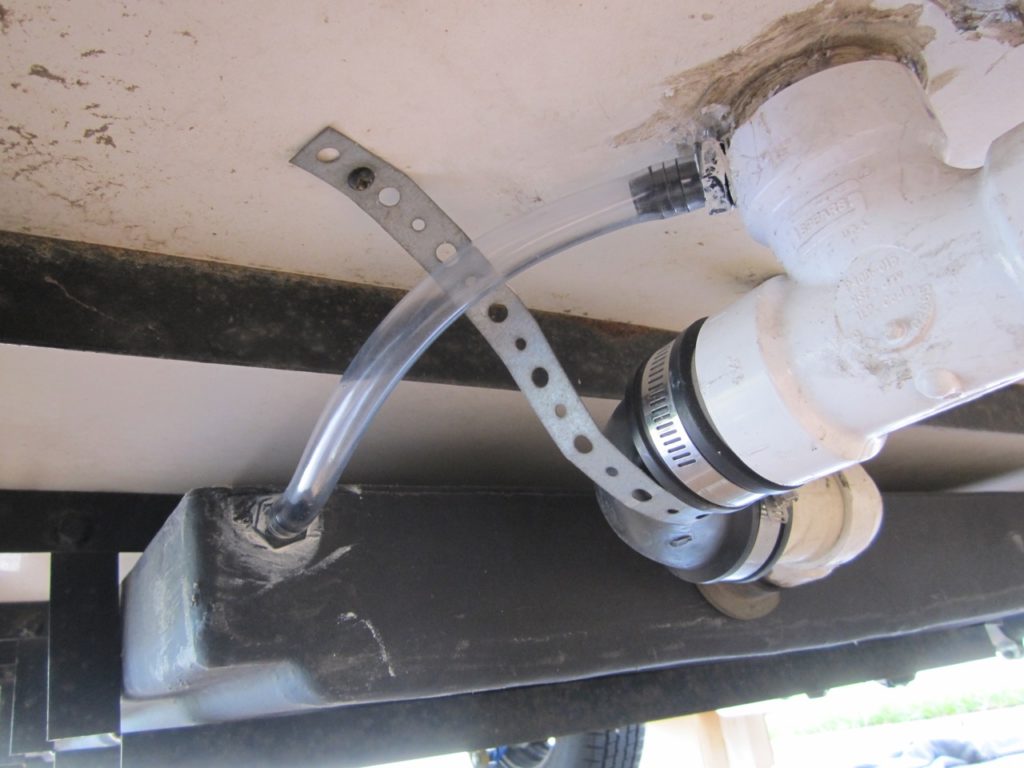
Here is the finished vent connecting the tank to the vent stack/kitchen sink drain with a section of clear hose.
I tested out the fast gray on our last camping trip and the gray dumped much faster compared to the old trickle. It’s a worthwhile improvement with real-world results.

11 comments
You’re amazing! Thanks for generously sharing your handy modifications with us.
Great walk through! Question: what is the purpose of an additional 1/2″ gray tank vent line tied to the 2″ vent line when the gray tank has a 2″ pipe going directly to the vent? It doesn’t make any sense, unless the 2″ shower drain line is greatly obstructed and it’s not able to vent..
The tank gets a trapped air bubble in the top because the 2″ drain line doesn’t go all the way to the top of the tank. The vent mod does so it’ll let out trapped air and get a few more gallons of capacity back.
I have never understood why it’s necessary to add an additional 1/2″ vent line from the gray tank to the 2″ vent pipe when the gray tank is already vented with a 2″ pipe. It doesn’t make sense.
Sorry – my MacBook told me the post I made yesterday didn’t work.
Can you elaborate a little on the installation new piece to the gray water tank ? Do you in insert a new section of pipe by glueing it and then attach a rubber coupler to the pipe & then another section of pipe towards the drain ?
No glue or rubber needed. The holes into the tank and PVC drain are drilled and tapped (threaded) for the fittings. I use some pipe dope on the threads. Then the 1/2″ PVC hose is slipped onto the barbed fittings. Then the trapped air has a place to go and you get more grey tank capacity.
I’m sorry … I didn’t make my self clear …. I’m uncertain about the replacement of the drain line into the tank, not the vent. I understand you remove the old drain line by working it gently until it comes out of the tank. My question is ….. is there a new section of pipe that is then inserted into the tank & glued to the tank and then a rubber coupling fitted to the retainer of the drain line going to the dump valve?
The drain line just twists and pulls from the tank. Then the rubber coupler goes over the outside of the tank drain fitting. No more pipe going to the tank. That helps even more grey water drain out.
Question if you don’t mind. From the picture it looks like the waste line from the grey water tank to the Valterra valve is 2″ and not the original 1 – 1/2″, Is this correct?
Thank you
Yes the fast grey kit upgrades the line to 2″.