
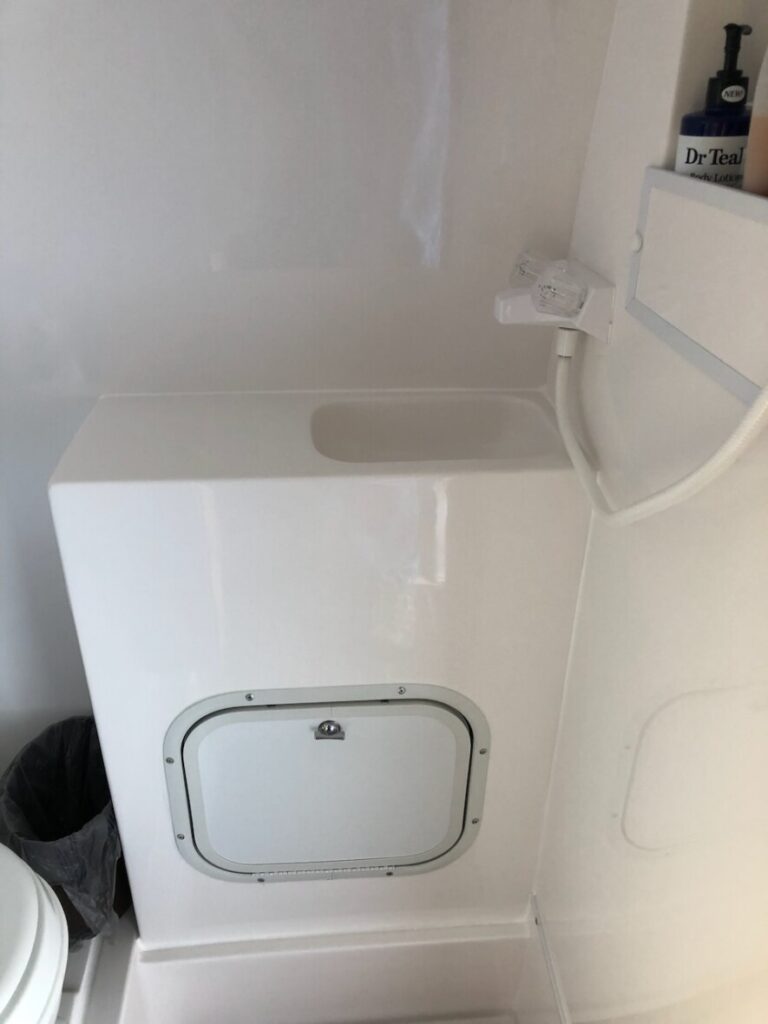
This modification adds a shower mixer to the bathroom wall and swaps out the sink faucet for a high rise. This only works on Casita bathrooms with the corner sink, not the newer built in vanity (2018+). Little House Customs makes a kit, or you can put your own kit together.
You will need to be able drill 2 holes through the fiberglass bathroom wall and cut some plastic PEX pipe. LHC’s kit has push-to-connect plumbing tee’s or if you have a crimper you can use cheaper PEX fittings with crimp rings. The following tool and parts lists are hyperlinked to Amazon to make assembling your kit easier.
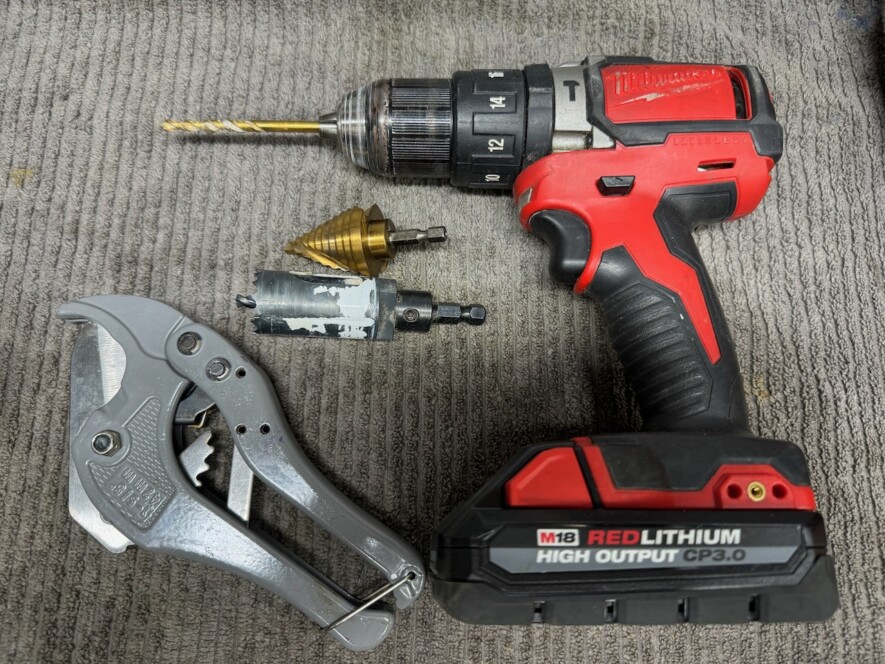
Tool list:
- Drill, 3/16″ and 1″ bits
- Pex tubing cutter
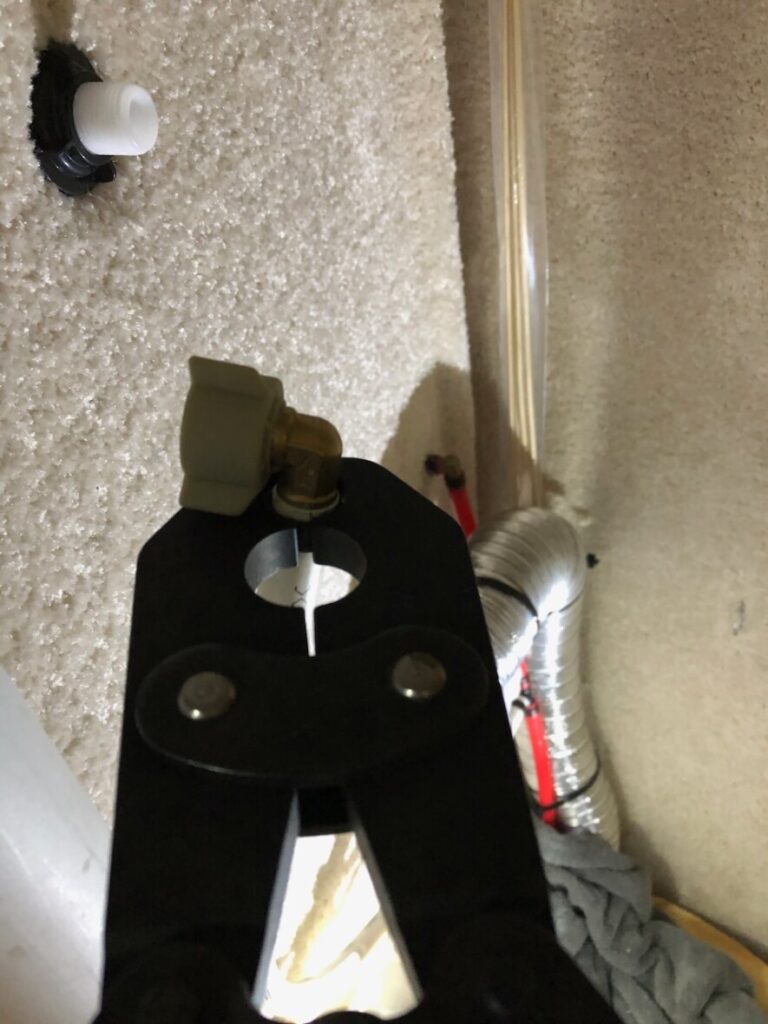
- PEX crimper if not using self sealing fittings (this kit includes the cutter too)
- Optional if you don’t have strong hands: Sink Basin Wrench
Parts list:
- Little House Custom’s Bathroom remodel kit
OR…
- Durafaucet DF-SA100 shower mixer (available with multiple finishes and knob styles)
- Durafaucet DF-PB150A faucet
- Sharkbite 1/2″ tees x2
- Swivel 90’s for faucet 1/2″, x2
- 5′ stick of red and blue PEX tubing from the local hardware store, or all white- whatever matches your trailer
After turning off the water and opening the faucet it’s time to remove the faucet. Reach under the sink and loosen the PEX pipe rings, then unscrew the threaded rings holding the faucet to the sink. These can be tight. You can wear gloves or use a basin wrench but I’ve been able to get them off by hand. Clean the gook off the sink and set the new faucet in place, install the 2 rings and thread them up about half way so the faucet is very loose. Use this extra movement to more easily attach the PEX lines. Once they are theaded on, continue turning the 2 lock rings all the way up so the faucet is tight to the sink, then go back to the PEX fittings and tighten those rings more.
Next mount the shower mixer to the wall by finding the correct placement on the wall. Go around to the closet and see where the vertical vent pipe is. Measure from the center of the vent pipe to the front of the closet wall – it should be about a foot. Then from the same wall, go into the bathroom and add about 3″ to the closet measurement so make ensure the mixer will be clear of the vent pipe. For the height, you can choose whatever is most comfortable, somewhere between waist and chest high on the wall. Make marks to drill – two dots on the wall, 4″ apart. Start with a small 3/16″ bit as a test hole, then go into the closet and confirm it’s clear of anything. When happy, use a 1″ hole saw or step bit to open up the holes. Insert the shower mixer and install the two threaded rings. Note: If the test hole was in a bad spot, you can use a rivet and snap cap to fix the goof, and try again.
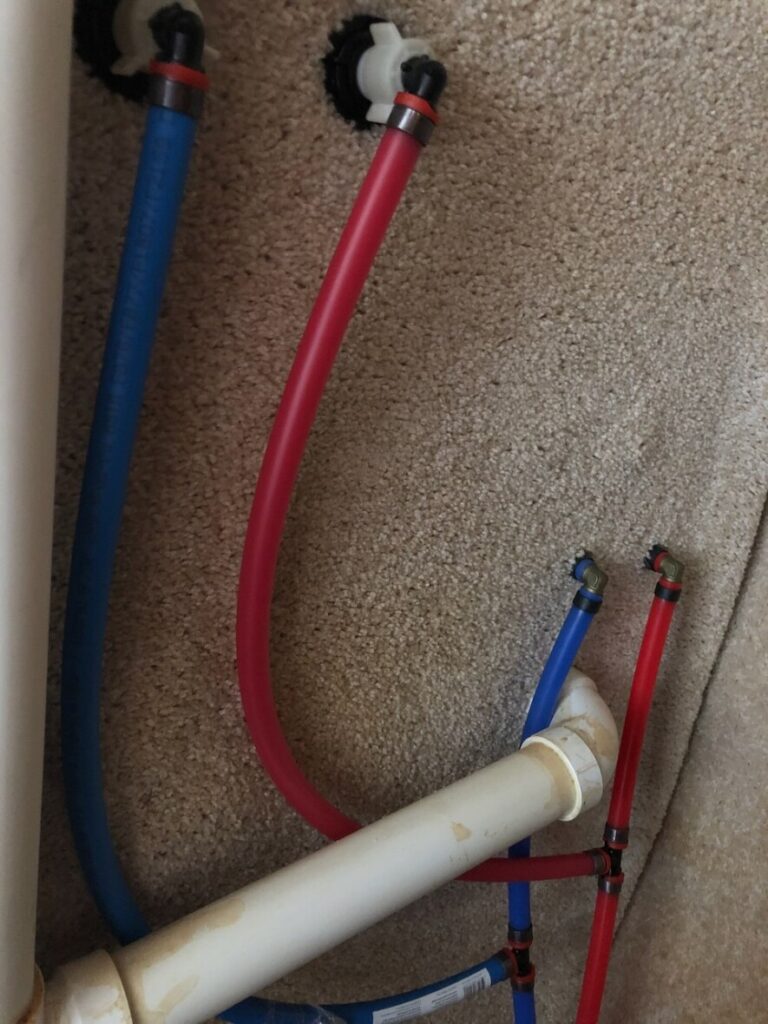
Now, onto the plumbing. Some Casitas have blue and red PEX in the closet, some others are white. If it’s white, the hot line is the one towards the front of the trailer. Using a pair of PVC/PEX tubing cutters, cut the hot line and insert the self sealing tee or a standard tee with crimp rings. For the cold line, make your cut a few inches above or below the previous one for clearance and install that tee. Using new pieces of 1/2″ PEX hose, cut lengths to go from the shower mixer to the newly installed tee’s.
I’ve found that the Casita shower holder works with most shower heads. However if it doesn’t fit, or you want matching chrome, you can remove the old one and install the holder that came in the box. Likely one hole will have to be drilled to line up the new holes.
Slowly turn on water to pressurize the system and check everywhere for leaks. If you have any leaks, refit or tighten the connection and try again. If it’s all tight and dry, enjoy your new luxury shower.