Works for Curb Side kitchens (Spirit and Freedom layouts)
We usually tow our Casita with empty tanks to minimize weight because it’s easier to tow. An exception is when traveling to destinations without water hookups. In that case, we fill the fresh water tank prior to arriving at the campsite. On a couple of trips we had lost half of our water on the way to camp. We confirmed our suspicions on the internet forums, water was leaking out of the air vent hose. It’s a common problem.
Fortunately, the solution was both cheap and easy. A longer vent hose is run forward up under the kitchen sink and back. This long loop of hose keeps water from running out when the Casita is going up a hill.
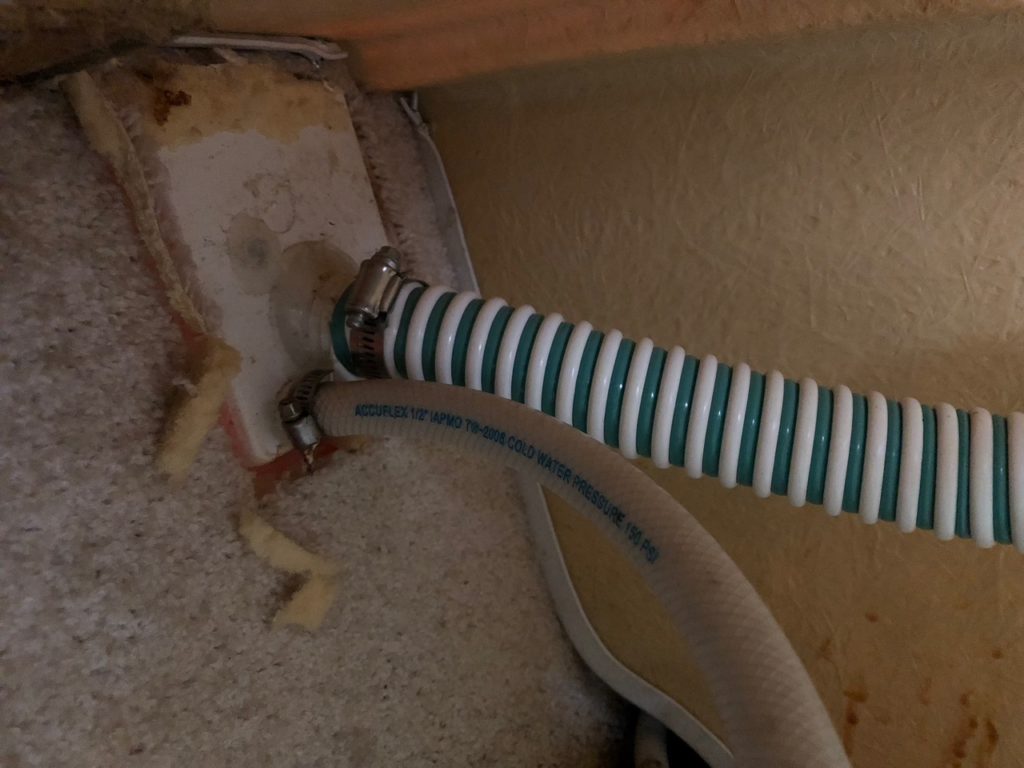
The smaller hose in the picture is the vent hose that was replaced. As it comes from the factory, the vent line allows water from the tank to drain out when the Casita is going uphill. The picture below is the water fill and vent line that is under the dinette bench seat.

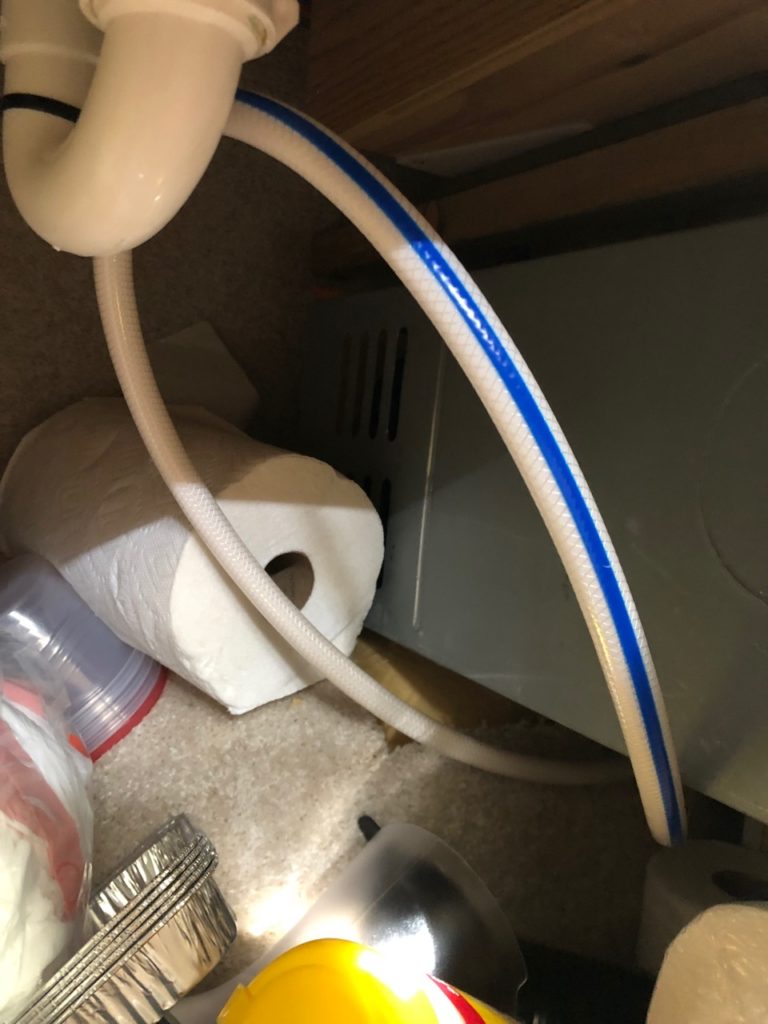
I bought a 1/2″ diameter, 25 foot long, drinking-water-safe hose. The fittings were cut off of the ends because they aren’t needed. One end of the hose goes to the tank vent. The hose runs under the furnace, then under the kitchen sink. A zip tie holds the hose to the drain pipe under the sink, then it goes back to the rear of the Casita, making a large loop. In the water tank compartment, a few zip ties hold the hose up and out of the way. The end of the hose terminates at the vent fitting on the rear wall of the Casita with a hose clamp.
In the main photo for the article you can see the hose with the blue stripe going past the tank, that’s the new vent line.
Problem solved.

The longer vent line still does its job of letting air in and out of the water tank, but water can’t leak out anymore. It makes some “gurgly” noises when filling the tank, but arriving in camp with a full tank of water is well worth it.


7 comments
Greg, Thanks so much for your many FB posts and for this DIY webpage. I find your advice to be spot on.
Did the vent mod today on my ‘17 17’ SD. Looking forward to arriving with a full tank. Bet the other drivers behind me will appreciate not getting splashed too!
Greg, did you consider using a check valve? Here’s an example https://www.amazon.com/Flow-H2O-Beverage-Hydroponics-Anti-Back/dp/B07L2VMNCN/ref=sr_1_15?dchild=1&keywords=1%2F2+inch+water+check+valve+water&qid=1626569336&sr=8-15 I would be interested to hear your thoughts. Thanks – John
I did. The issue with a check valve is that the vent has 2 purposes. 1) let air in as the water level drops. 2) let air out as the tank is filled. With a check valve, you could over pressurize the tank by accident if pressure filling. I ran a little house custom’s filler adapter that hooked a hose to the bottom drain to fill, so the vent needs to be there to let air out- or you have to remember to take the fill cap off to let air out.
Greg, thank you for your well thought out insights, as always. That LHC tank bottom fill is an interesting idea. I have an idea to convert the under sink space into drawers at some point in the near future, so was interested in preserving that space. I put a drawer in the middle space under the bottom bunk and found that to be a much better user experience compared to the standard issue cupboard. Admittedly I do lose some volume to the sliders, etc. All the best
Thank you Greg for all your great advice.
You need to remember to blow out the line during the winterization process
Good point!