
")
If you’re new to RV’ing, you might not know about the “colors” of water. Clear is the drinking water. Supplied by either the onboard tank or a “city connection”, which is fancy talk for attaching a water hose to the camper.
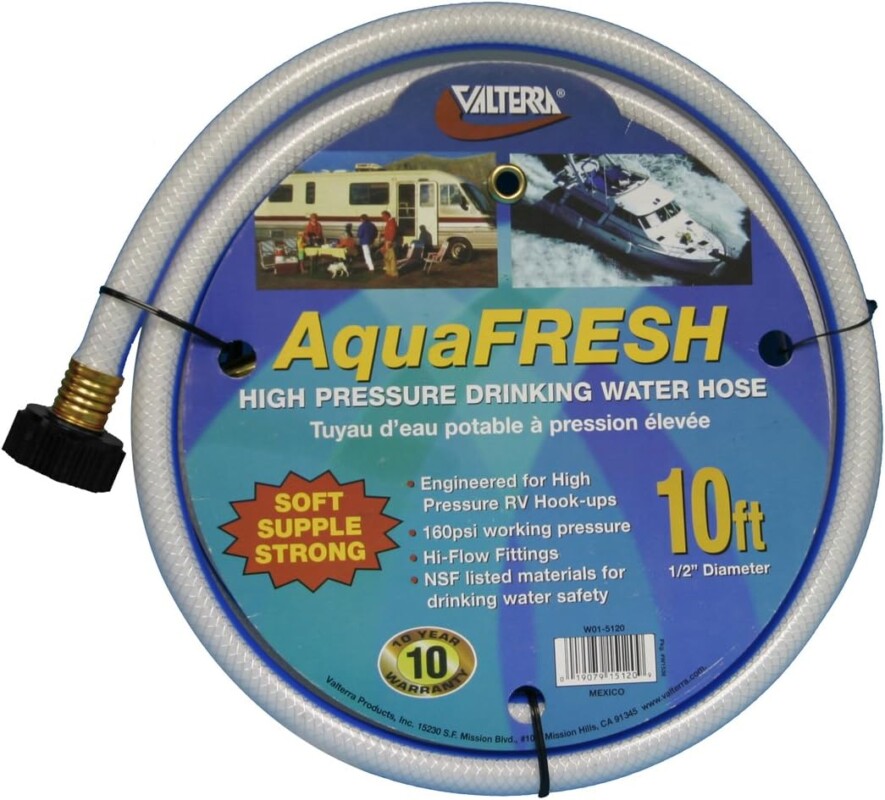
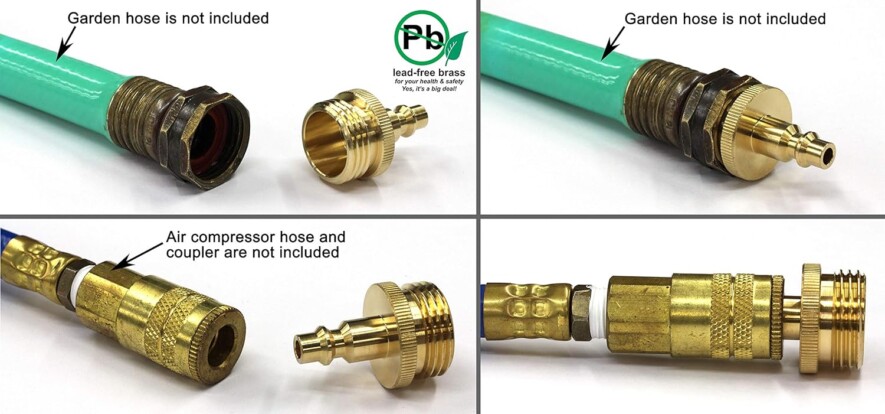
Tip: It’s very important to use a drinking water safe hose instead of a “garden” hose. Drinking water hoses are typically white or blue and sold as RV or Marine hose. Garden hoses can leech harsh chemicals and lead (the poisonous metal) into your water.
Grey water is collected from the shower and sink drains. It’ll get a little smelly since it contains food particles. Black water… well lets just say that’s what you flush.
Drinking Water:
Pressure Regulator:
It’s important to protect your camper from too much water pressure as the plastic plumbing and fittings are fragile. The Casita plumbing shouldn’t have over 55psi. We use a pressure regulator.
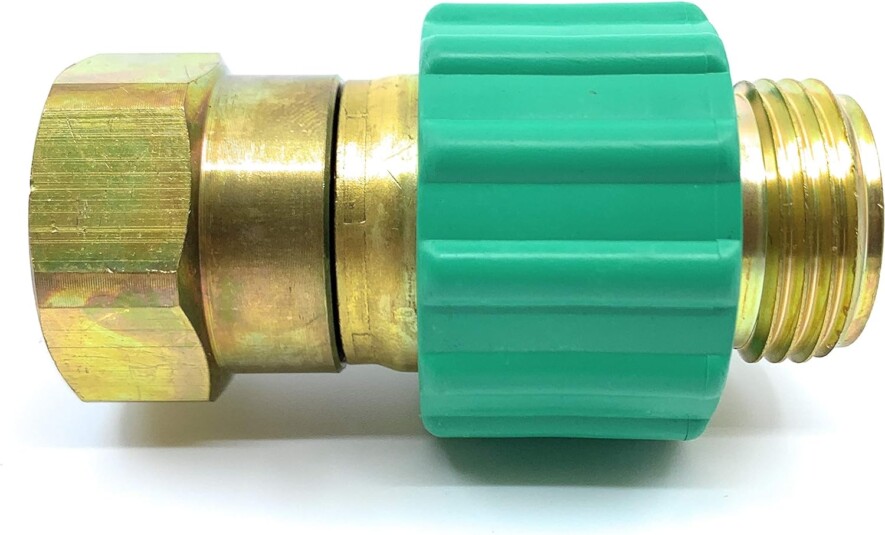
But I like to have “the best” and the Fairview is not only lead free but doesn’t restrict water flow like the cheaper ones do. The green plastic collar slides down and acts like a built in wrench to tighten and loosen, which is a great feature.
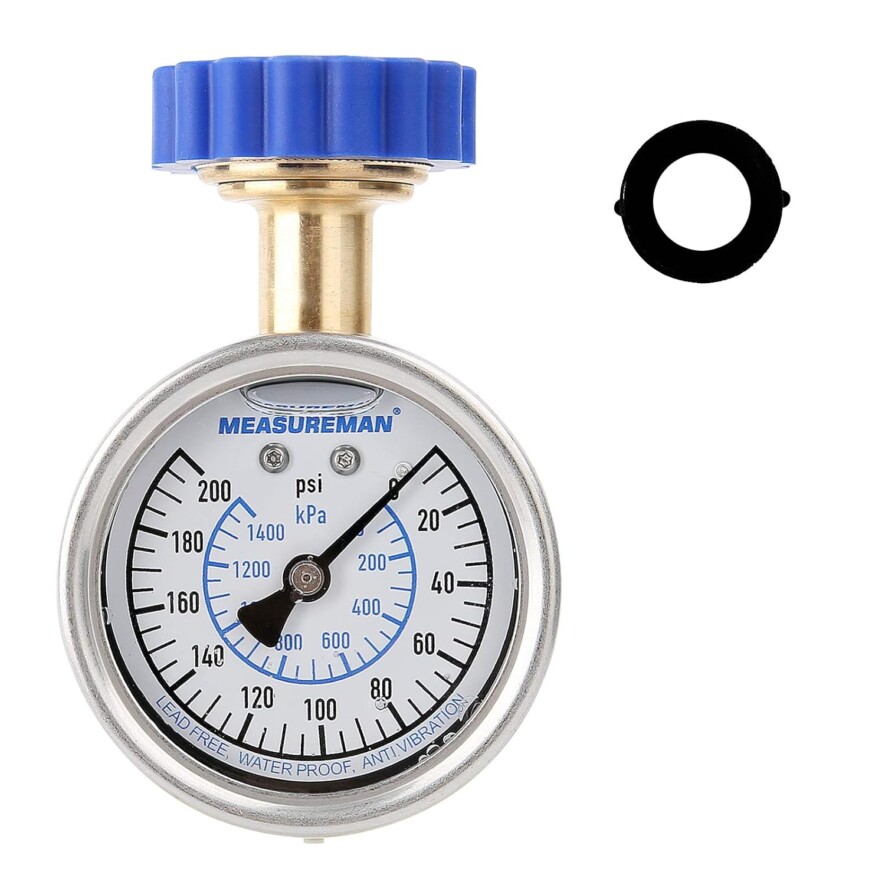
Water Pressure Gauge:
You can also get a cheap water pressure gauge to make sure the camp ground isn’t going to blow the plumbing. Or if you hook at home.
Water Filter:
You don’t want grit and sediment getting into the camper’s water system so you need a water filter. We prefer these cheap disposable ones. They work great and last a few months before replacing them. For the first purchase, get this one with the flexible strain relief, it’s a good deal. For refills, buy the 2 packs.
Hoses:
It’s more useful to carry 2 shorter hoses rather than 1 long hose. I have a 10 and 25 footer and use the shortest one needed for hookups. I can also combine them to reach 35′ if needed.
The “black”
When I was new to RV’ing, I most feared dumping the tank, but with the right gear, it’s a non-issue. Fill the black tank with a lot of water before dumping. I use a self coiling garden hose passed through the bathroom window for that chore. In a pinch you can use the shower and aim down the bowl with the flushing pedal depressed.
Dump the black first, close the valve, then dump the gray. The soapy grey water will help flush out the sewer hose.
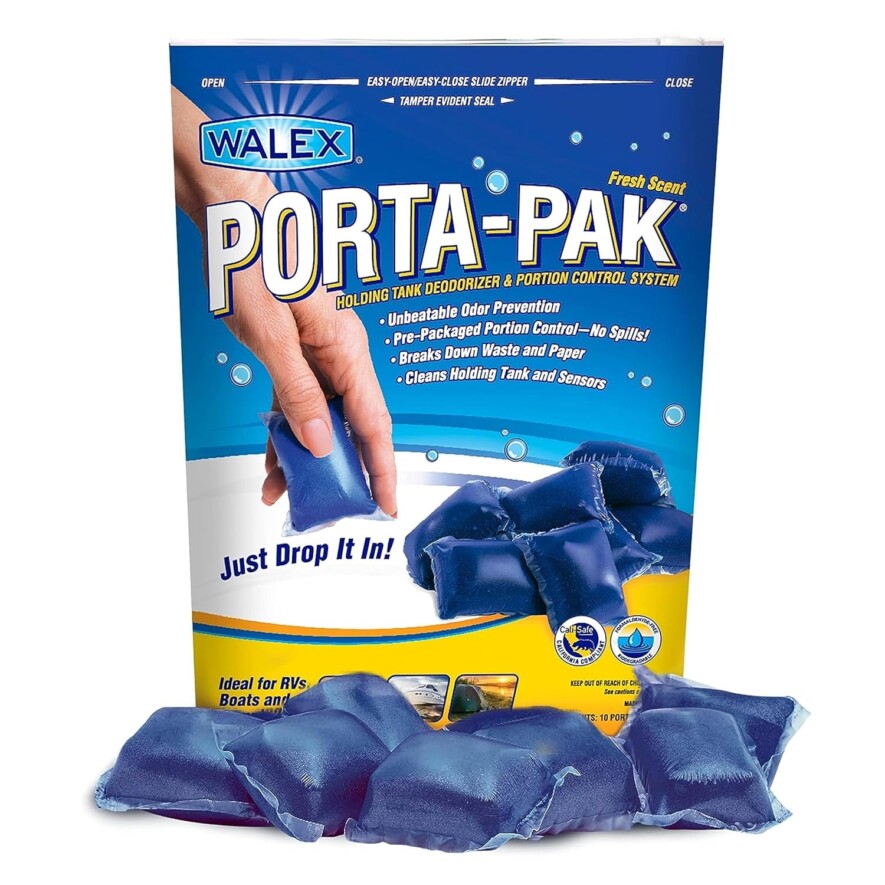
I keep a small plastic bin with holes drilled in the lid so the contents can dry. I keep a box of nitrile gloves, 90 degree adapter, and bag of “porta-paks” to chemically treat the empty tank.
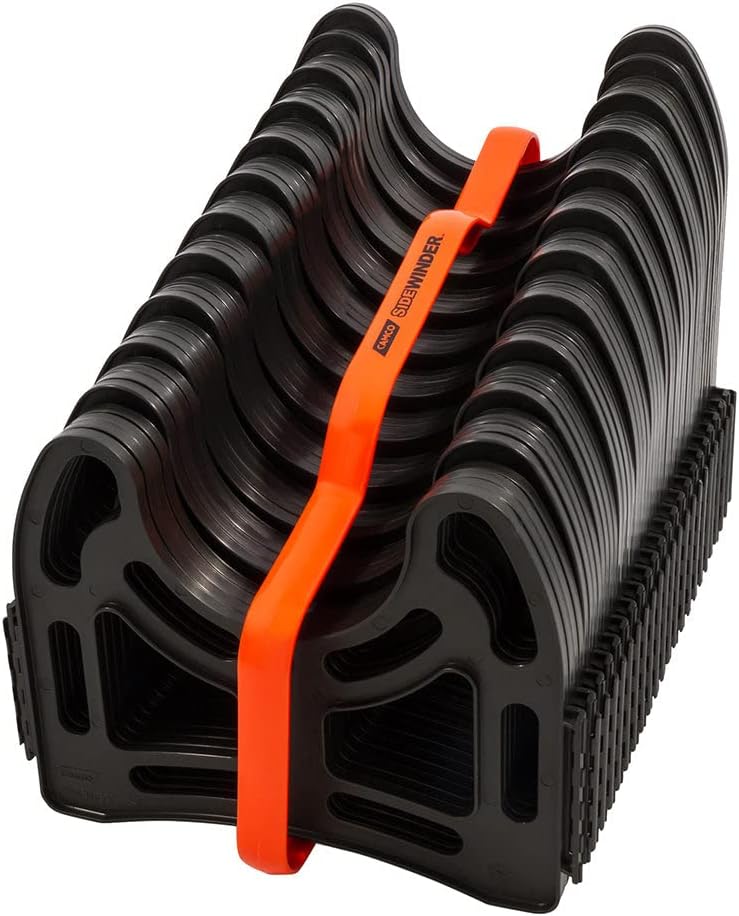
The Camco Sidewinder is nice so you don’t have to “milk the hose” to get all the stuff out of it. I do find that chore pretty gross. It’s used when camping with a sewer hookup at the site, so the hose can stay on a constant slope.
You need a 90 degree fitting so the sewer hose can fit the dump fitting in the ground. They make clear ones (gross). I like the opaque one you can’t see inside of.

These Walex Porta-Pak’s are awesome. When the black tank is empty, drop one into the toilet bowel (push the flush pedal) and let some water go into the tank. The black tank will actually smell good. Amazing stuff.
Toilet Paper:
What about the super expensive RV/marine toilet paper? It’s not needed! Any septic safe off-the-shelf paper should be fine. I use the Costco Kirkland brand. If you are not sure and want to test your paper, put some in a jar with water and shake it up to see if it breaks down.
Winterizing:
If your camper is going to experience below freezing temperatures, it’s vital to winterize it. The Casita manual does a good job of explaining the procedure. If you have access to an air compressor, this adaptor lets you blow the water lines clear with air. It makes the process faster and easier. Pay attention and keep the pressure below 50psi so you don’t explode the plumbing! Air compressors run up to 120psi if you don’t regulate them down.
8 comments
Hey nice tips and article ! ? thanks
Hey thanks Greg. It’s good to have a person like yourself to help us newbies. Thanks for all the tips.
I was going to order the Fairview pressure regulator but the description on Amazon says it regulates to 55psi. You mentioned that Casita recommends less than 50psi…are these numbers correct, and is it still safe to use this product at at the stated 55psi ?
Thanks for doing this website….great info for Casita owners!
Thanks,
Gary
55 is just fine, that’s a ball bark of 50 psi. Basically you don’t want 80-100+ psi which can wreck all kind of RV plumbing stuff. That’s a great deal on Amazon, about half the price of the one I bought from an RV parts place. https://amzn.to/3wPZw9b
Thank you. 2013 Casita Independence, how do you know the water level in the 3 tanks?
Water tank by looking at it through the hatch. Black tank by the sound it makes while going to the bathroom. Grey, you’ll learn with experience when it’s filling up based on your water usage. Or when the shower floor or sink starts to fill up. Gauges don’t work on the very shallow grey tank.
Thanks, sounds like a You Tube video is in order for that black tank sound 🙂
Ewwww, no thanks. It’s pretty difficult to fill up 15 gallons of black tank in a short trip though. The grey is what fills quick if you’re taking showers.