
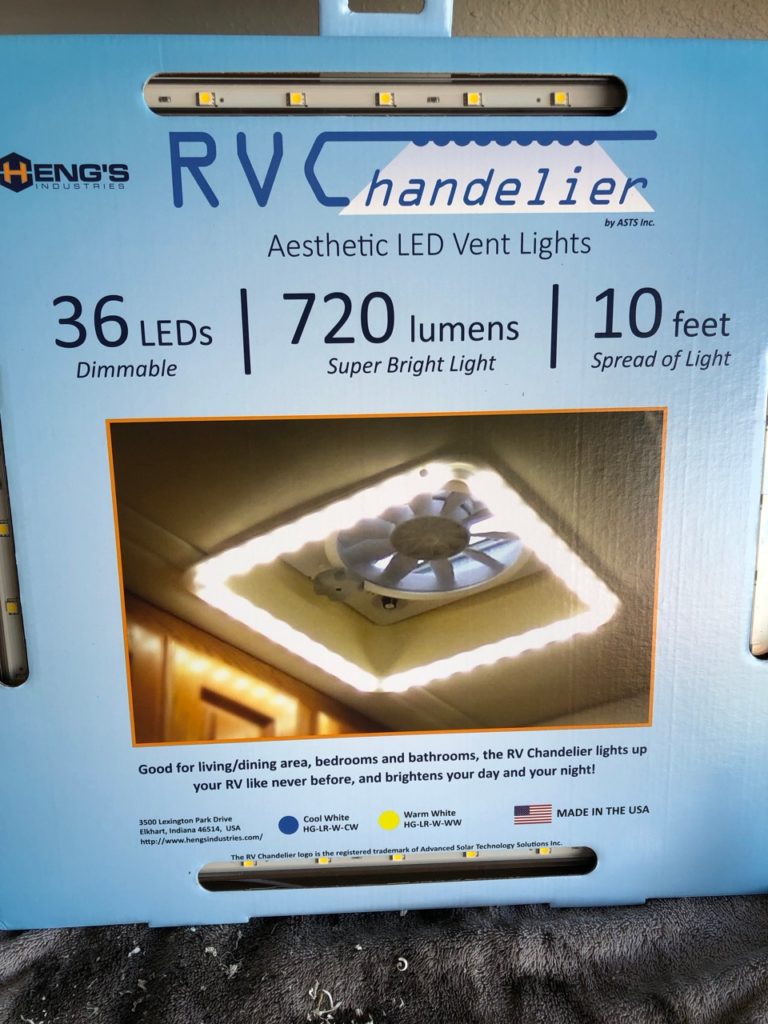
This LED chandelier adds lots of needed light in a Casita. This made in-the-USA light by Heng’s is available in 4 versions: clear or frosted lens and “cool” or “warm” light. The warm clear is my favorite as the “cool” is a little harsh on the eyes. It works on both the older Fan-Tastic and newer Maxx-air fans.
The installation isn’t quite “plug ‘n play” and I consider this to be a “medium” to “difficult” mod. There’s quite of bit of parts juggling overhead. If you’re coordinated and up for a challenge, follow along as I install one. A helper comes in handy although I manage it solo.
The first step is to pull the fuse from the converter panel that powers the ceiling fan. Carefully remove the round screen. Next remove the screw in the crank handle knob and remove the knob. All the Phillips screws holding the fan in need to come out. The fan will hang from it’s wires.
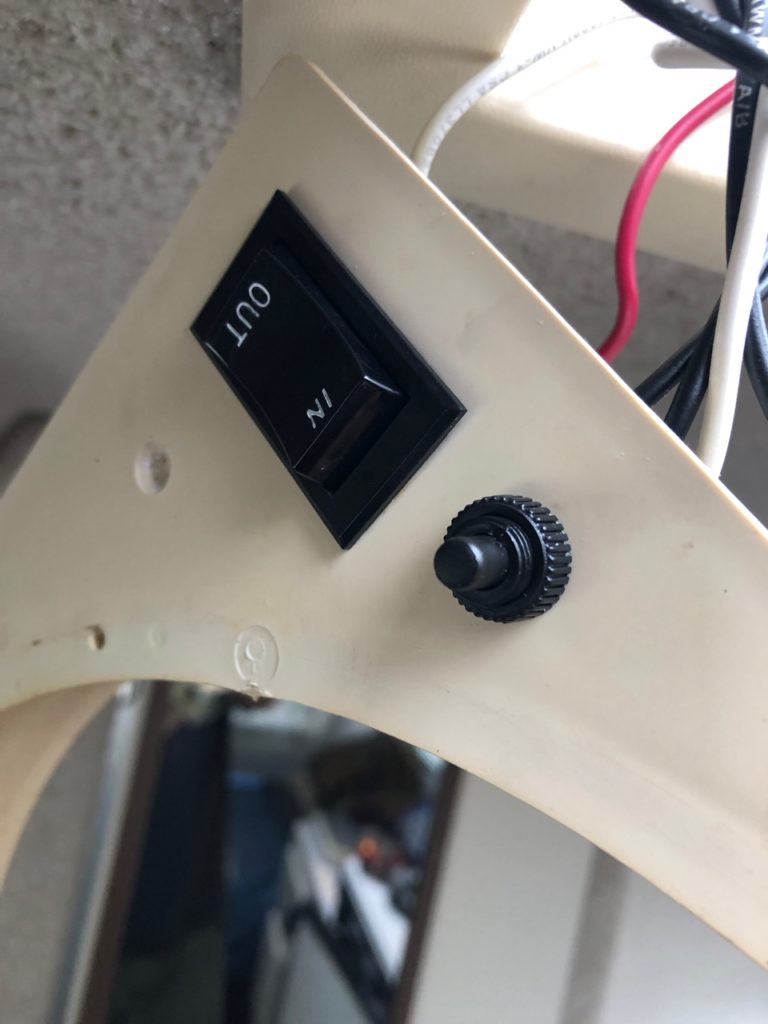
With a step bit, drill a 7/16″ hole in this location for the push button switch. It will just fit. Insert the switch and screw on the knurled ring.
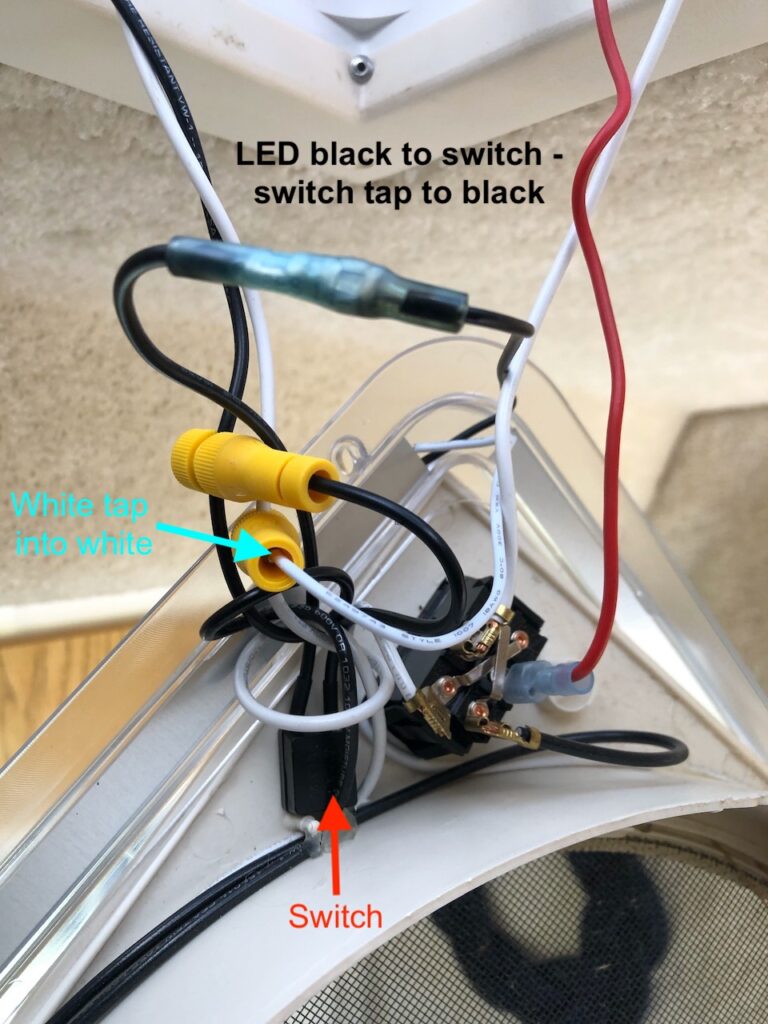
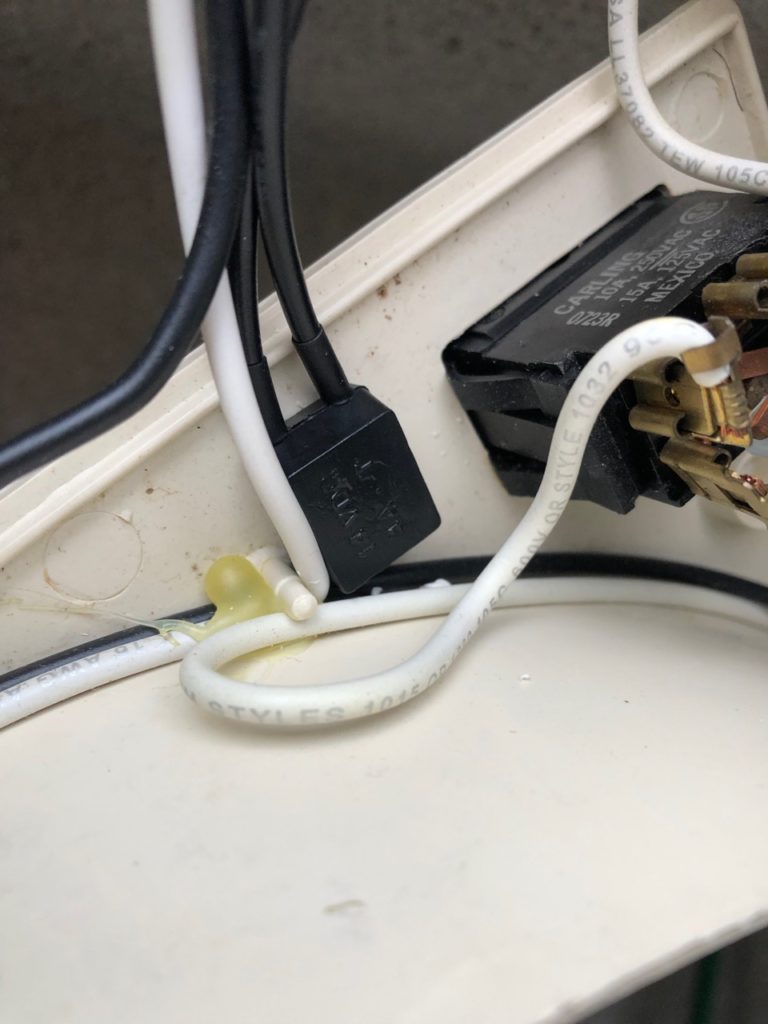
Now for the fun part. One of the black wires from the switch goes to the black wire on the LED light. Using a yellow Posi-tap, splice the other black switch wire into the black fan wire BEFORE it goes to the 3 speed resistor/fan speed switch (otherwise the fan speed will change the brightness of the light!). The white wire from the light taps into the fan’s white wire. Again into a section of wire that goes from the Casita to the fan, not a wire after the 3 speed switch.
Before assembling the fan, insert the fuse and try the light to ensure it works. If it does, it’s time to button it up. Carefully put the fan back in place, tucking the wires between the inner and outer shells of the fan housing. Tuck the lighting wires up so there’s just enough slack for the light bezel to fit up against the fan. Insert the Phillips screws that hold the fan, but don’t tighten them all the way down.
Have 4, short #6 stainless screws ready to go. Tighten up the fan, hold the light into position, and carefully attach the light with the 4 screws by letting them self-drill into the plastic trim of the fan. Don’t over tighten, just a little snug. Reattach the knob and enjoy your new lighting!
Parts and Tools needed:
- 2 Yellow Posi-taps
- 1 blue inline crimp connector
- 4 short #6 screws (1/2″ long)
- Wire stripping and crimping pliers
- Phillips screwdriver or screwgun
- Step bit